There is nothing quite like the visual allure of a perfectly baked Key Lime Bundt Cake. This particular recipe isn’t just a dessert; it is a centerpiece designed to capture the essence of a sun-drenched tropical afternoon. With its deep fluted ridges and a thick, snowy-white glaze that pools in the valleys of the cake, it looks as professional as it tastes.
When you slice into this cake, you aren’t met with a standard yellow crumb. Instead, you’ll find a moist, pale lime-green interior that provides a stunning contrast to the golden-brown, caramelized exterior. It’s the kind of handheld smartphone-worthy aesthetic that makes home baking feel like a culinary triumph.
Whether you are serving this at a summer garden party or as a refreshing finish to a heavy meal, the bright acidity of the key limes paired with a dense, buttery crumb creates a balance that is second to none. Let’s dive into the science and art of creating this citrus masterpiece.

The Anatomy of a Perfect Citrus Bundt
- Vibrant Contrast: A deep golden-brown outer crust hides a surprising, pale lime-green interior crumb.
- Glaze Consistency: A thick, opaque white lime icing that stays put, drizzled generously to highlight the fluted shape.
- Sensory Garnish: Finished with a heavy dusting of bright green lime zest and exactly three thin, circular slices of fresh key lime.
- Textural Balance: A tight, moist crumb that holds its shape under the weight of a heavy sugar glaze.
Essential Components for a Zesty Citrus Cake
To achieve the specific visual and structural results of this Key Lime Bundt Cake, every ingredient serves a dual purpose for both flavor and chemistry. We aren’t just looking for sweetness; we are looking for the perfect reaction between citrus and leavening.
Unsalted Butter: 1 cup (225g) of room temperature butter is the foundation. It provides the fat necessary for a tender crumb and the “golden-brown exterior” described in our visual prompt.
Granulated Sugar: 2 cups (400g) of sugar provide more than sweetness. During the creaming process, sugar crystals cut into the butter, creating tiny air pockets that allow the cake to rise beautifully in a fluted pan.
Large Eggs: 4 room temperature eggs provide the protein structure. This ensures your cake doesn’t collapse under the weight of the thick lime icing.
All-Purpose Flour: 3 cups (375g) of flour give us the sturdy, dense crumb typical of a high-end bundt. It’s the canvas for our lime-green interior.
Baking Powder & Soda: A combination of 1 tsp (5g) baking powder and 1/2 tsp (3g) baking soda ensures the cake lifts away from the intricate ridges of the pan.
Buttermilk: 1 cup (240ml) of full-fat buttermilk is the secret to moisture. The acid in the buttermilk reacts with the lime juice to keep the crumb tender and the color vibrant.
Fresh Key Lime Juice: 1/2 cup (120ml) of freshly squeezed juice. Avoid the bottled stuff; the natural acidity is required to achieve that specific pale green hue without tasting artificial.
Key Lime Zest: 2 tbsp (12g) for the batter and extra for the “heavy dusting” garnish. The oils in the zest provide more flavor than the juice itself.
Natural Green Food Color (Optional): 1-2 drops. While the zest provides color, a single drop of natural coloring ensures the “pale lime-green interior crumb” is visible even after baking.
Confectioners’ Sugar: 3 cups (360g) for the glaze. This high volume is necessary to create an “opaque white” finish rather than a translucent drip.
Required Tools for the Fluted Aesthetic
Achieving the look of a professional Key Lime Bundt Cake requires the right equipment. A 10-12 cup fluted bundt pan is non-negotiable. Look for a heavy-duty cast aluminum pan to ensure even heat distribution, which leads to that perfectly uniform golden-brown exterior.
You will also need a fine-mesh zester (like a Microplane) to achieve the “heavy dusting” of zest. Unlike a traditional grater, a microplane creates light, fluffy zest that sits on top of the icing without sinking. Finally, a simple white ceramic cake stand will provide the neutral background needed to make the green and white colors pop.

The Scientific Process to a Golden-Brown Crust
Phase 1: Preparing the Pan and Creaming
Preheat your oven to 350°F (175°C). Liberally grease your fluted pan with baking spray or a butter-and-flour coating. Ensure every ridge is covered; this is the only way to get those deep vertical ridges visible in the final photo.
In a large bowl, cream the 1 cup (225g) butter and 2 cups (400g) sugar for at least 5 minutes. You want the mixture to look pale and fluffy. This aeration is key to a cake that isn’t overly dense.
Phase 2: Building the Emulsion
Add the eggs one at a time, beating well after each addition. If the batter looks curdled, don’t panic; adding a tablespoon of your flour will help pull the emulsion back together. Stir in your 2 tbsp (12g) of lime zest and the optional drop of green color now to ensure even distribution.
Phase 3: The Dry and Wet Alternate
Whisk your dry ingredients together. Begin adding them to the butter mixture, alternating with the 1 cup (240ml) buttermilk and 1/2 cup (120ml) lime juice. Start and end with the flour. This technique prevents the gluten from over-developing, keeping that pale lime-green crumb tender.
Phase 4: Baking for Visual Perfection
Pour the batter into the prepared pan, smoothing the top with a spatula. Bake for 50-60 minutes. You are looking for a specific sensory cue: the cake should pull away slightly from the edges, and the top should be a deep, “golden-brown exterior.” A wooden skewer inserted into the center should come out clean or with a few moist crumbs.
Crafting the Thick Opaque Lime Icing
The glaze is what transforms this from a simple cake into a Key Lime Bundt Cake masterpiece. To get that “thick, opaque white” look, you must control the ratio of liquid to sugar strictly. Mix 3 cups (360g) of sifted confectioners’ sugar with 3-4 tbsp (45-60ml) of lime juice.
The icing should be the consistency of thick molasses. If it’s too runny, it will soak into the cake; if it’s too thick, it won’t “pool slightly in the deep vertical ridges.” Pour it over the completely cooled cake, allowing it to gravity-drip down the sides naturally.
Expert Tips for a Flawless Release
- The Cooling Rule: Let the cake cool in the pan for exactly 10 minutes. Any less and it’s too fragile; any more and the sugar in the crust will “glue” itself to the pan.
- The Tap and Shake: Before inverting, give the pan a few firm taps on the counter to loosen the edges.
- Zest Timing: Apply the heavy dusting of bright green lime zest while the icing is still wet so it adheres properly.
- The Centerpiece Garnish: Place your three thin, circular slices of fresh key lime near the center of the cake, slightly overlapping, to mimic the high-end bakery look.
Preserving the Freshness
This cake is exceptionally moist thanks to the lime juice and buttermilk. Store it under a cake dome at room temperature for up to 3 days. If you need to keep it longer, you can refrigerate it, but the glaze may lose some of its opaque whiteness as it absorbs moisture from the fridge.
For long-term storage, the unglazed cake freezes beautifully. Wrap it tightly in plastic wrap and foil. When you are ready to serve, thaw it at room temperature and apply the fresh lime icing and zest then for the best visual results.
Refreshing Pairings and Menu Ideas
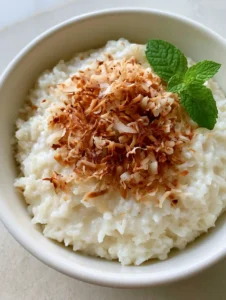
This Key Lime Bundt Cake is a fantastic conclusion to a tropical or Mediterranean-inspired meal. For a cohesive dessert table, consider pairing it with other vibrant fruit-forward treats like strawberry matcha cookies or a light coconut rice pudding.
If you are looking for more citrus inspiration, our moist pineapple bread shares a similar bright profile. For those who love a dessert with a unique texture, serving this alongside a decadent chocolate pistachio tart provides a wonderful contrast in colors and flavors on a dessert spread.
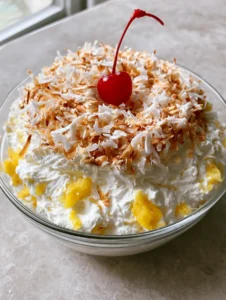
Finally, if you’re hosting a summer brunch, this cake pairs beautifully with tropical sides like pineapple coconut fluff, making for a light and airy accompaniment to the dense bundt cake.
Frequently Asked Questions
Yes, you can substitute regular limes, but the flavor will be less tart and floral. Key limes are smaller and more acidic, which gives this cake its signature ‘zing’.
It can stay at room temperature for 3 days. However, if your kitchen is very warm, refrigeration will help the thick glaze stay set, though it may lose some shine.
The combination of high-quality lime zest and the acidity of buttermilk helps maintain a natural light green hue. For a more pronounced color, you can add one drop of natural green food coloring.
Grease the pan thoroughly with baking spray containing flour, ensure you hit every ridge, and let the cake cool for exactly 10 minutes before inverting it.
A translucent glaze usually means there was too much liquid. To get a thick, opaque white icing, use a high ratio of confectioners’ sugar to lime juice and ensure the cake is completely cool.
The Ultimate Key Lime Bundt Cake Recipe

Key Lime Bundt Cake with Thick Opaque Lime Glaze
Ingredients
Equipment
Method
- Cream butter and sugar for 5 minutes until pale and fluffy. Add eggs one at a time, beating well.
- Stir in lime zest. Alternate adding dry ingredients and buttermilk/lime juice, starting and ending with flour.
- Pour into a greased fluted pan. Bake at 350°F (175°C) for 50-60 minutes until the exterior is a deep golden-brown.
- Cool the cake in the pan for 10 minutes, then invert onto a wire rack to cool completely.
- Whisk confectioners' sugar and lime juice until a thick, opaque white icing forms. Drizzle over the cooled cake so it pools in the ridges.
- Immediately apply a heavy dusting of lime zest and place three lime slices near the center.
Notes
Use fresh key limes rather than bottled juice for the most authentic flavor.

Join the Kitchen Community!
We hope this Key Lime Bundt Cake becomes a staple in your kitchen. There is something so rewarding about lifting that bundt pan to reveal the perfect golden ridges underneath. If you enjoyed this recipe, please leave a comment below and let us know how your “thick opaque glaze” turned out!
Don’t forget to share your creations and follow us for more visual recipe guides on Pinterest. Your support helps us keep the kitchen lights on and the oven preheated!