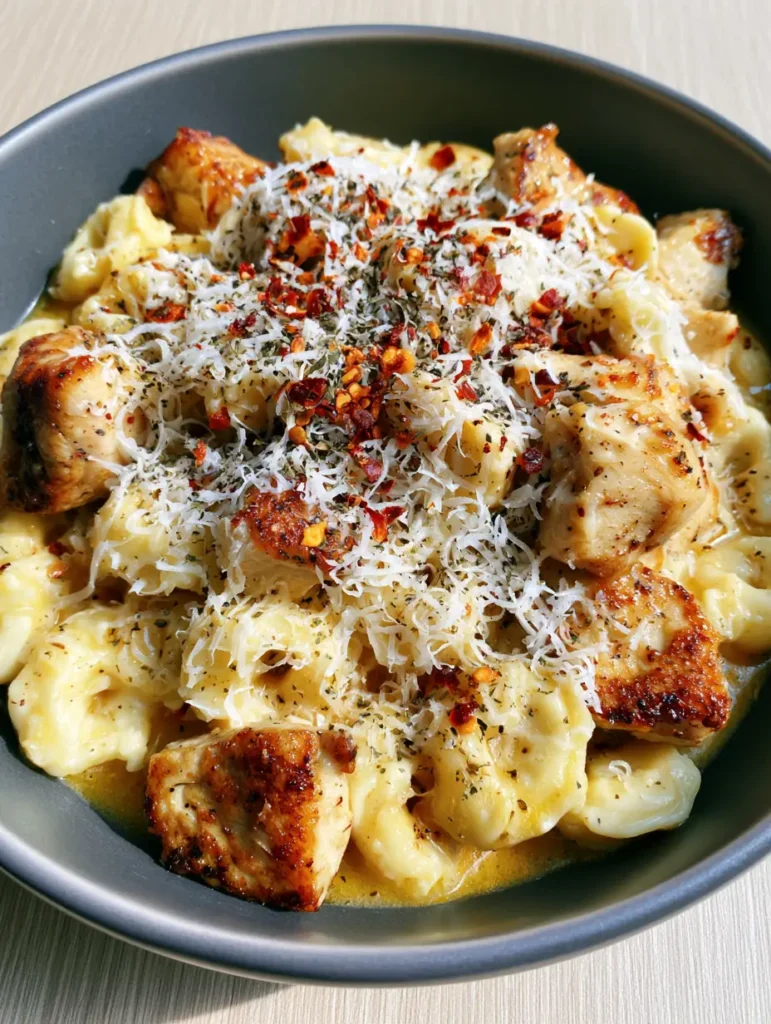
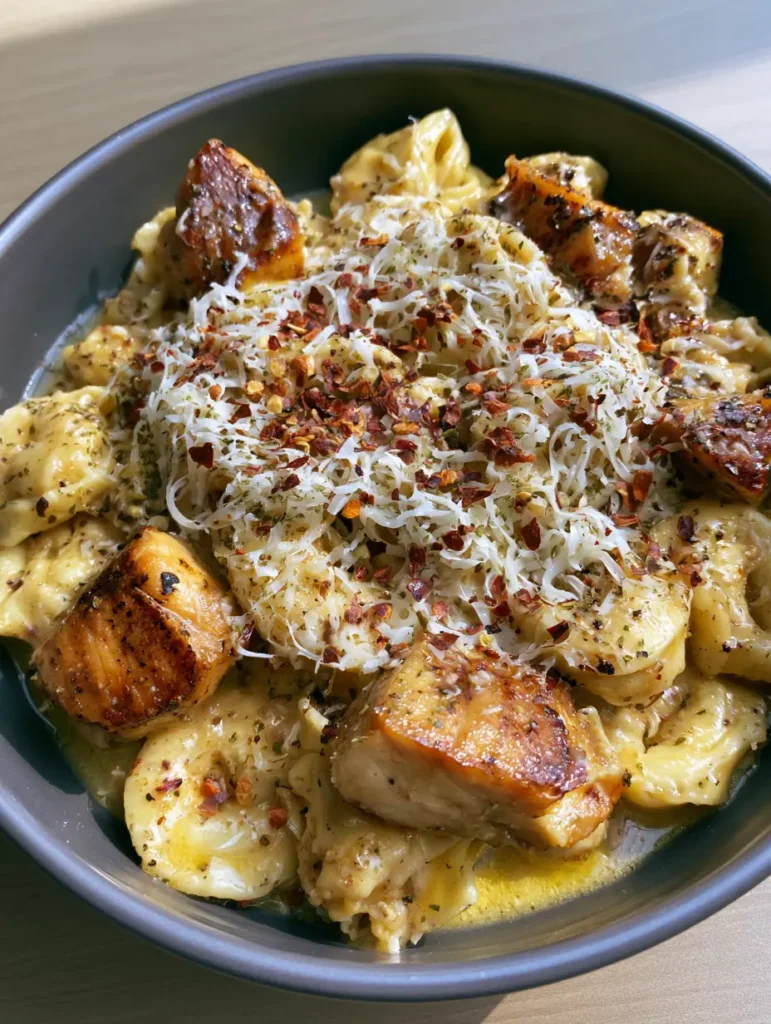
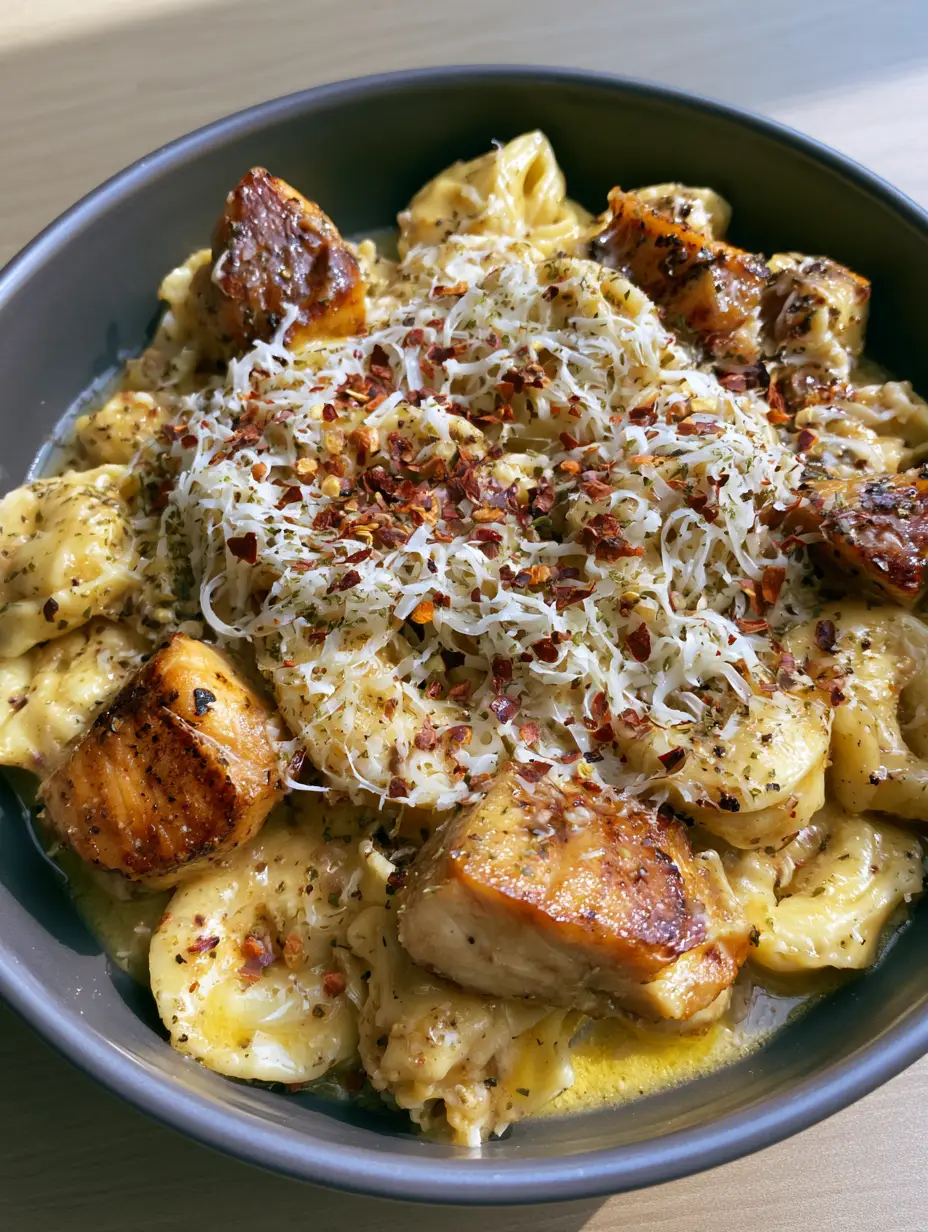
There is nothing quite like the sight of a Chicken Tortellini Recipe coming together in a single pan, where the steam carries the aroma of toasted garlic and sizzling butter directly to your senses. Imagine a shallow, dark grey ceramic bowl filled to the brim with plump cheese tortellini that glisten under a thick, glossy golden-yellow sauce.
This isn’t just a meal; it is a visual and culinary masterpiece designed for those who crave the perfect balance of heat and comfort. Every bite offers a contrast between the tender, pillowy pasta and the juicy cubes of chicken breast, each featuring distinct golden-brown pan-sear marks that signify deep flavor.
The finish is what truly elevates this dish to restaurant-quality status at home. A generous topping of finely grated white parmesan cheese begins to melt into the sauce, mingling with bright red crushed pepper flakes and a delicate sprinkle of dried green herb flakes for a pop of color and earthiness.
Why This Spicy Garlic Butter Pasta Will Become Your New Obsession
- The Perfect Sear: We use high-heat techniques to ensure the chicken cubes are golden-brown and crispy on the outside while remaining incredibly juicy inside.
- Glossy Emulsified Sauce: Unlike watery butter sauces, this recipe teaches you how to create a thick, golden garlic butter coating that clings to every curve of the tortellini.
- Textural Harmony: Experience the interplay between plump cheese-filled pasta, firm seared protein, and the delicate grit of finely grated parmesan.
- Customizable Heat: The crushed red pepper flakes provide a vibrant spicy kick that cuts through the richness of the butter and cheese.
Essential Components for the Ultimate Chicken Tortellini Recipe
Refrigerated Cheese Tortellini: 20 oz (567g). Using fresh or refrigerated tortellini ensures that “plump” look and a tender bite that frozen varieties often lack.
Chicken Breast: 1 lb (450g). Boneless, skinless breasts are cubed into 1-inch pieces to maximize surface area for those beautiful golden-brown sear marks.
Unsalted Butter: 1/2 cup (115g). This is the base of our golden sauce; using unsalted allows you to control the seasoning levels perfectly.
Fresh Garlic: 6 cloves (30g). Finely minced garlic provides the aromatic backbone and creates that “thick garlic butter” texture when sautéed gently.
Olive Oil: 2 tbsp (30ml). High-quality oil is necessary for searing the chicken at a high temperature without burning the butter.
Parmesan Cheese: 1/2 cup (45g). Use a microplane to achieve that “finely grated white parmesan” look that melts instantly into the dish.
Crushed Red Pepper Flakes: 1 tsp (2g). This adds the “spicy” element and creates the vibrant red flecks seen in our visual blueprint.
Dried Herb Flakes: 1 tsp (1g). A blend of dried parsley or oregano provides the “dried green herb flakes” that offer a professional finish.
Pasta Water: 1/4 cup (60ml). The secret “invisible” ingredient that uses starch to turn butter into a thick, glossy, golden-yellow sauce.
Kitchen Tools Required for Visual Perfection
To achieve the results seen in our handheld smartphone photo, you need a heavy-bottomed skillet, preferably stainless steel or cast iron. These materials are superior for creating those distinct pan-sear marks on the chicken.
You will also need a microplane or fine grater for the cheese. The goal is to create an intricate layer of parmesan that looks like fallen snow before it begins its delicious descent into the warm sauce.
Finally, a shallow dark grey ceramic bowl is the ideal vessel for serving. The dark background makes the golden sauce and bright red pepper flakes visually pop, creating an unedited, authentic aesthetic.
Mastering the Art of the Golden Pan-Sear
Prepping the Chicken for Maximum Flavor
Start by patting your chicken cubes completely dry with paper towels. Any moisture on the surface of the meat will create steam, preventing the golden-brown crust we are looking for.
Season the cubes generously with salt and black pepper. This is a foundational step that ensures the chicken isn’t just a protein source, but a flavor powerhouse in your Chicken Tortellini Recipe.
The Searing Process
Heat your olive oil in the skillet over medium-high heat until it shimmers. Add the chicken in a single layer, ensuring they aren’t crowded, which allows the heat to recover quickly between pieces.
Resist the urge to move them for at least 3 minutes. You want to see those distinct pan-sear marks develop; once they easily release from the pan, flip them to brown the other sides. Remove and set aside.
Building the Thick Glossy Garlic Butter Sauce
Infusing the Butter
Lower the heat to medium and add the butter to the same skillet. As it melts, it will pick up the “fond”—those brown bits left over from the chicken—which adds incredible depth to the sauce.
Add the minced garlic and crushed red pepper flakes. Sauté for about 60 seconds until the garlic is fragrant and the butter takes on a beautiful golden-yellow hue.
The Secret Emulsification Step
While the chicken was searing, you should have boiled your tortellini in salted water until just al dente. Reserve a small amount of that starchy pasta water before draining.
Whisk the pasta water into the garlic butter. This creates an emulsion, transforming thin melted butter into a thick, glistening sauce that will coat the plump tortellini perfectly.
Bringing the Chicken Tortellini Recipe Together
The Final Toss
Add the cooked tortellini and the seared chicken back into the skillet. Toss gently with a wooden spoon or silicone spatula to ensure every inch of the pasta is glistening.
Listen for the “slurp” sound as the pasta hits the sauce; this indicates the consistency is correct. If it looks too dry, add another tablespoon of pasta water.
The Visual Garnish
Turn off the heat before adding the toppings. Sprinkle the dried green herb flakes evenly across the pan for that earthy aroma and visual contrast.
Transfer the mixture into your shallow dark grey bowl. Immediately top with the finely grated parmesan cheese, watching as it begins to soften and melt into the crevices of the pasta.
Expert Tips for Success
- Don’t Overcook the Pasta: Tortellini continues to cook slightly when tossed in the hot butter sauce. Pull them out of the water 1 minute before the package instructions suggest.
- Garlic Timing: Garlic burns easily. Make sure your pan isn’t screaming hot when you add it to the butter, or it will turn bitter instead of sweet and aromatic.
- Cheese Quality: Use a block of Parmesan Reggiano rather than pre-shredded cheese. Pre-shredded versions are coated in potato starch, which prevents that beautiful, seamless melt.
- Heat Control: If the sauce starts to separate, whisk in a teaspoon of cold water and stir vigorously to bring the emulsion back together.
What to Serve with Spicy Garlic Tortellini
Because this Chicken Tortellini Recipe is rich and buttery, it pairs beautifully with something bright and crisp. A strawberry pecan chicken salad provides a refreshing fruity contrast that cleanses the palate between bites.
If you are hosting a larger gathering, you might want to start with a fun appetizer like creamy elote dip. The corn and lime flavors surprisingly complement the spicy garlic notes in the pasta.
For those who love a Mediterranean vibe, these mediterranean chicken tacos share similar flavor profiles of garlic and herbs if you’re looking for meal prep inspiration for the week.
Storage and Reheating Advice
This dish is best served immediately to maintain the glossy texture of the sauce. However, leftovers can be stored in an airtight container in the refrigerator for up to 3 days.
When reheating, do not use the microwave if possible, as it can cause the butter to separate and the chicken to become rubbery. Instead, place it in a small skillet with a splash of water or milk over low heat.
Gently stir until the sauce becomes creamy again. You may need to add a fresh sprinkle of parmesan and dried herbs to revive the visual appeal after reheating.
Frequently Asked Questions
Absolutely! Chicken thighs are very forgiving and will develop beautiful sear marks while remaining extremely juicy. Follow the same cubing and searing instructions.
Yes, but you should boil them directly from frozen. They may not appear as ‘plump’ as refrigerated tortellini, but they will still taste delicious in the garlic butter sauce.
The key is to pat the chicken completely dry with paper towels and use a high-heat oil like olive oil in a preheated skillet. Do not crowd the pan or move the chicken too early.
It has a moderate kick from the 1 teaspoon of red pepper flakes. You can easily adjust the heat by reducing the flakes to 1/2 teaspoon or increasing them for more fire.
The sauce needs starch to emulsify. Ensure you are adding at least 1/4 cup of starchy pasta water and whisking it vigorously with the melted butter and garlic over medium heat.
The Ultimate Chicken Tortellini Recipe Card
Chicken Tortellini Recipe with Spicy Garlic Butter and Seared Chicken
Ingredients
Equipment
Method
- Pat chicken cubes dry and season with salt/pepper. Heat olive oil in a skillet over medium-high heat. Add chicken in a single layer and cook for 3-4 minutes per side until distinct golden-brown pan-sear marks appear. Remove and set aside.
- Boil cheese tortellini in salted water until just al dente. Reserve 1/4 cup (60ml) of starchy pasta water before draining.
- Lower heat to medium and melt butter in the same skillet. Sauté minced garlic and red pepper flakes for 60 seconds. Whisk in the reserved pasta water to emulsify into a thick, glossy golden-yellow sauce.
- Toss tortellini and chicken in the sauce until glistening. Transfer to a bowl and top with finely grated parmesan, dried herbs, and extra red pepper flakes.
Notes
Pat the chicken completely dry before searing to ensure golden-brown marks.
Join the Kitchen Spark Community
This Chicken Tortellini Recipe is more than just a quick dinner; it’s a staple for anyone who loves bold flavors and beautiful presentation. If you enjoyed making this, please leave a comment below and let us know how your seared chicken turned out!
Don’t forget to follow us on Pinterest for more daily recipe inspiration. If you take a photo of your dark grey bowl of pasta, tag us so we can see your culinary handiwork!
For more easy vacation-ready meals, check out our guide on easy vacation meals to keep your cooking stress-free and delicious.