There is a specific kind of magic that happens when fire meets fruit and fermented soy. These Hawaiian Chicken Sandwiches aren’t just a meal; they are a sensory journey that transports your kitchen straight to a sun-drenched coastline. Inspired by the vibrant flavors of Huli Huli chicken, this recipe focuses on the structural harmony between a buttery toasted bun and a deeply caramelized, glazed protein.
When you take your first bite, you’ll experience the crunch of fresh green leaf lettuce followed by the succulent, salt-sweet profile of a perfectly grilled chicken breast. The crowning jewel is a thick, charred pineapple ring topped with a hand-diced salsa that provides a sharp, acidic brightness. This is the gourmet handheld experience your summer grilling rotation has been missing.
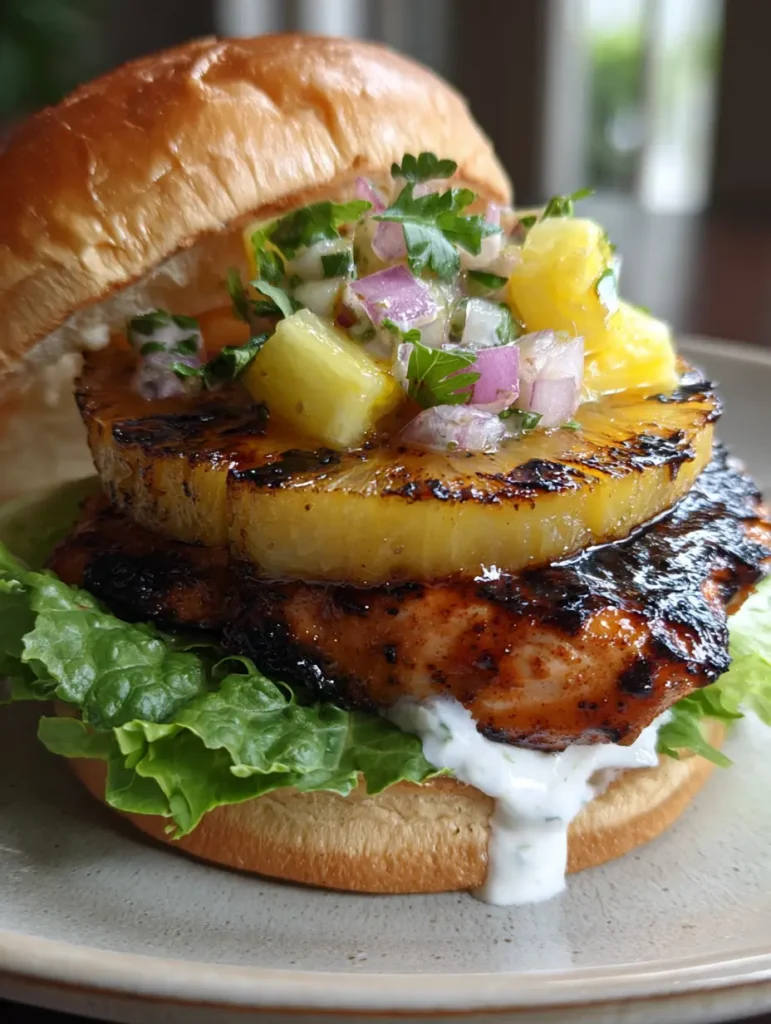
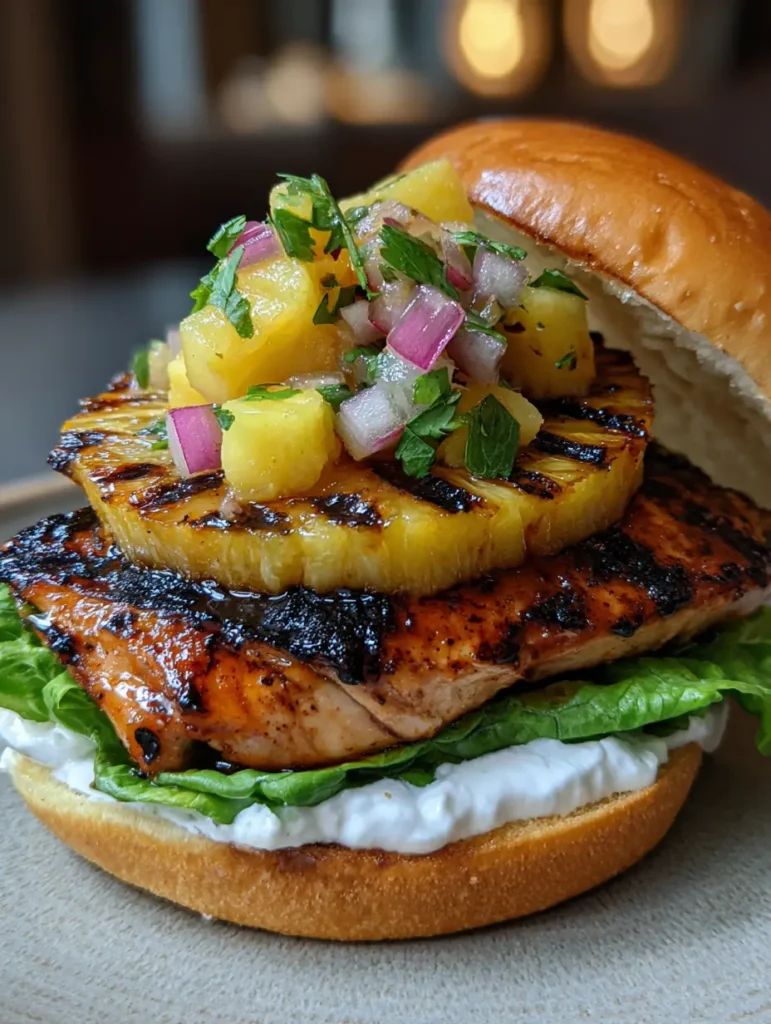
As seen in our professional kitchen captures, the visual appeal of these Hawaiian Chicken Sandwiches relies on those deep, dark grill marks and the glistening sheen of a homemade glaze. Whether you are hosting a backyard luau or looking for a weeknight escape, this recipe delivers restaurant-quality results with foolproof techniques. Let’s dive into the anatomy of the perfect tropical sandwich.
Why This Tropical Chicken Recipe Wins Every Time
- The Perfect Texture Contrast: You get the soft, pillowy crumb of toasted brioche against the crisp snap of vibrant green leaf lettuce.
- Umami-Rich Glaze: A balanced marinade of soy, ginger, and garlic creates that iconic “glistening brown” finish seen in the photos.
- Dual-Layered Pineapple: We use both a warm, charred ring for sweetness and a cold, chunky salsa for a refreshing acidic bite.
- Visual Sophistication: The vibrant colors of red onion and fresh cilantro make these sandwiches look as incredible as they taste.
- Handheld Ergonomics: Despite the thick layers, the creamy mayonnaise acts as a “glue” to keep your components perfectly stacked.
The Anatomy of Hawaiian Chicken Sandwiches: Essential Ingredients
Boneless Skinless Chicken Breasts: We use 4 large breasts (approx. 1.5 lbs / 680g) pounded to an even thickness. This ensures the chicken cooks uniformly while maintaining a juicy interior that won’t dry out on the grill.
The Signature Huli-Style Glaze: A blend of 1/2 cup (120ml) pineapple juice, 1/4 cup (60ml) soy sauce, and 2 tbsp (30g) brown sugar. This combination provides the sugars necessary for those beautiful, caramelized grill marks.
Brioche Buns: These high-fat, egg-based buns provide the structural integrity needed to hold the heavy toppings. Always toast them with a little butter to create a moisture barrier against the mayo and juices.
Fresh Pineapple Rings: You will need 1 large fresh pineapple, sliced into 1/2 inch (1.25cm) thick rounds. Fresh fruit holds its shape much better than canned versions when subjected to high grill heat.
Chunky Pineapple Salsa: A mixture of 1 cup (150g) diced pineapple, 1/4 cup (40g) finely diced red onion, and 2 tbsp (5g) chopped fresh cilantro. The red onion adds a necessary sharp bite to cut through the sweetness of the glaze.
Creamy White Mayonnaise: Use 1/2 cup (115g) of high-quality, full-fat mayonnaise. This adds a rich, velvety mouthfeel and balances the acidity of the lime and pineapple.
Green Leaf Lettuce: Choose the vibrant, curly tops of the lettuce for maximum visual impact and a fresh “crunch” factor. Avoid iceberg here, as it lacks the aesthetic “vibrance” required for this gourmet presentation.
Foundational Seasonings: You’ll need 1 tsp (6g) kosher salt, 1/2 tsp (1g) black pepper, and 1 tbsp (15ml) neutral oil. The oil is a “hidden” ingredient that prevents the glazed chicken from sticking to the grates.
Professional Tools for Gourmet Grilling
To achieve the “cross-hatch” grill marks shown in our visuals, a cast-iron grill pan or a high-heat outdoor grill is essential. You will also need a sharp chef’s knife for dicing the salsa ingredients to a uniform size, ensuring every bite has the perfect distribution of onion and cilantro. A meat thermometer is your best friend here—aim for an internal temperature of 165°F (74°C) to keep that chicken glistening and moist.
How to Master the Hawaiian Chicken Sandwiches
Step 1: The Marination Station
In a medium bowl, whisk together your pineapple juice, soy sauce, brown sugar, minced ginger, and garlic. Submerge your chicken breasts in this mixture for at least 30 minutes, though 2 hours is the sweet spot for flavor penetration. This step is what creates the “glistening brown glaze” that defines the dish’s appearance.
Step 2: Crafting the Chunky Pineapple Salsa
While the chicken marinates, combine your diced pineapple, red onion, and chopped cilantro in a small glass bowl. Add a squeeze of fresh lime juice and a pinch of salt to draw out the natural juices. Let this sit at room temperature so the red onion can mellow slightly and the flavors can marry.
Step 3: Achieving the Perfect Char
Preheat your grill to medium-high heat (approx. 400°F / 204°C). Lightly oil the grates to prevent sticking. Place your pineapple rings directly over the heat and grill for 2-3 minutes per side until dark, charred cross-hatch marks appear. If you enjoy bold flavors, try brushing the rings with a little cowboy butter for an extra savory kick.
Step 4: Grilling the Glazed Chicken
Remove the chicken from the marinade and place it on the grill. Cook for 5-7 minutes per side, brushing occasionally with the leftover marinade (boiled first for safety) or extra glaze. Look for the visual cue of “dark, caramelized grill marks”—this indicates the sugars have properly reacted with the heat. The chicken should feel firm to the touch but still have a slight “give.”
Step 5: Toasting the Foundation
Split your brioche buns and lightly butter the cut sides. Place them face-down on the grill for 30-60 seconds. You are looking for a “golden-brown” toasted surface that smells slightly of toasted brioche and sugar. This is a critical step for preventing a soggy sandwich experience.
Step 6: The Architect’s Assembly
Spread a thick dollop of creamy white mayonnaise on the bottom bun. Lay down a single, vibrant green leaf of lettuce. Place the hot chicken breast on top, followed by the grilled pineapple ring. Spoon a generous amount of the chunky salsa into the center of the pineapple ring. Top with the second bun at an angle to showcase the layers, allowing a bit of mayo to “drip” down the side for that authentic, handheld look.
Expert Tips for the Perfect Tropical Sandwich
- Pound the Poultry: Use a meat mallet to ensure your chicken breasts are an even 3/4 inch thickness. This prevents the edges from drying out while the center finishes cooking.
- The “Salsa Soak”: Drain any excess liquid from your salsa before topping the sandwich. This keeps the bun from getting soggy while preserving the “chunky” texture.
- High Heat is Key: To get those distinct, charred cross-hatch marks on the pineapple, make sure your grill is screaming hot before the fruit touches the grate.
- Rest the Meat: Let the chicken rest for 3 minutes before assembling. This allows the juices to redistribute so they don’t leak out and ruin your toasted brioche.
Storage, Reheating, and Make-Ahead Advice
Hawaiian Chicken Sandwiches are best enjoyed immediately to preserve the contrast between the hot chicken and cold salsa. However, you can prep the salsa up to 24 hours in advance. Store leftover grilled chicken in an airtight container for up to 3 days. To reheat, use a toaster oven at 350°F (175°C) to keep the glaze tacky and the meat moist; avoid the microwave as it can turn the chicken rubbery.
What to Serve with Your Hawaiian Sandwiches
Pair these tropical delights with something that balances the sweetness. A side of salty, crispy fries or a light slaw works beautifully. If you’re looking for more inspiration, these sandwiches pair exceptionally well with grilled shrimp skewers for a “surf and turf” platter. For a completely different flavor profile next time, consider trying our chicken torta recipe (coming soon) which uses similar grilling techniques with a Mexican flair.
Frequently Asked Questions
Yes, the salsa can be made up to 24 hours in advance. In fact, letting it sit for a few hours allows the red onion to soften and the cilantro flavors to fully infuse the pineapple.
While canned pineapple works in a pinch, fresh pineapple is highly recommended. Fresh slices are sturdier and hold up much better to the high heat required to get those beautiful charred grill marks.
The secret is the sugar content in the glaze and frequent basting. Brush the chicken with the marinade every few minutes during the final stage of grilling to build up a tacky, caramelized layer.
If you prefer not to use mayo, a thick Greek yogurt mixed with a little lime juice or a ripe mashed avocado provides a similar creamy contrast to the charred chicken and pineapple.
Spread a thin layer of butter on the cut sides and place them directly on the grill or a pan for 30-60 seconds. This creates a golden-brown crust that prevents the mayo and salsa from making the bun soggy.
The Ultimate Hawaiian Chicken Sandwiches Recipe
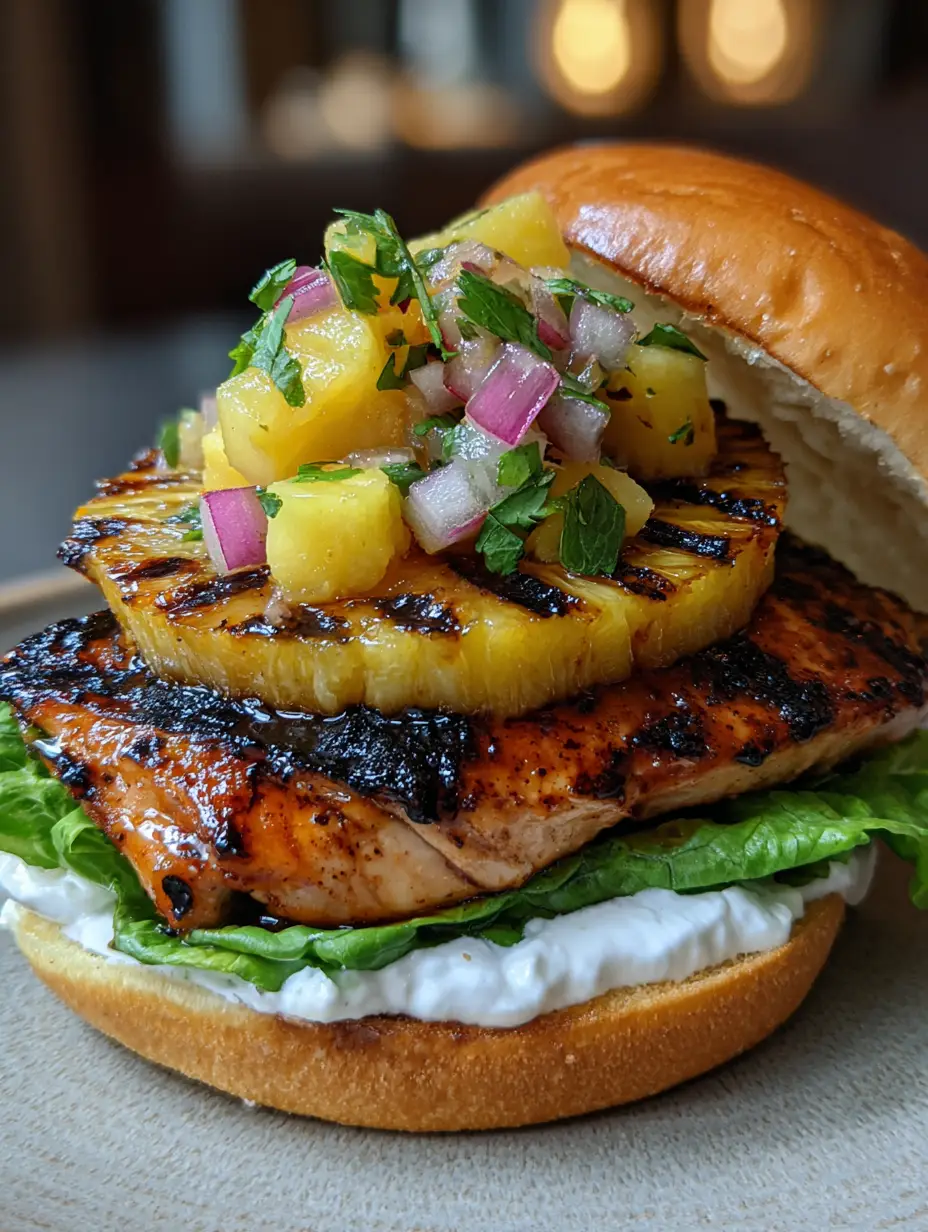
Hawaiian Chicken Sandwiches with Charred Pineapple and Chunky Salsa
Ingredients
Equipment
Method
- Whisk pineapple juice, soy sauce, brown sugar, ginger, and garlic. Marinate pounded chicken for 30 mins to 2 hours.
- Toss diced pineapple, red onion, and cilantro in a bowl. Season with a pinch of salt and lime juice; set aside.
- Grill pineapple rings over high heat for 2-3 minutes per side until charred cross-hatch marks appear.
- Grill chicken for 5-7 minutes per side, brushing with glaze until glistening and internal temp is 165°F (74°C).
- Toast buns, spread mayo on bottom, layer lettuce, chicken, charred ring, and a heap of salsa. Angle top bun.
Notes
Ensure the grill is preheated to high for those professional cross-hatch marks.
Join the Kitchen Community!
We hope these Hawaiian Chicken Sandwiches bring a taste of the islands to your dinner table tonight! If you enjoyed the balance of charred pineapple and savory glaze, please leave a comment below and let us know how yours turned out. Don’t forget to share your creations and tag us on social media! For more visual inspiration and recipe saves, head over to our Pinterest page.