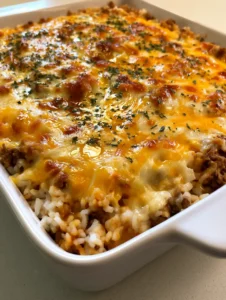
There is something inherently comforting about a heavy, black cast iron skillet sizzling on the stove. This Pepperoncini Chicken Skillet captures that rustic, home-cooked essence perfectly, blending the sharp, vinegary bite of pickled peppers with a luxurious, pale-ivory cream sauce. It is a dish designed for those who crave bold flavors but only have thirty minutes to get dinner on the table.
When you first look at this dish, you are struck by the vibrant contrast of colors. The golden-brown crust on the chicken medallions peeks through a thick, glossy sauce, while the yellowish-green pepper rings and bright green flat-leaf parsley create a visual feast. It looks exactly like the handheld smartphone photos we love to share—unpretentious, steaming hot, and undeniably delicious.
The beauty of the Pepperoncini Chicken Skillet lies in its simplicity and its scientific balance. The acidity from the pepper brine cuts through the richness of the heavy cream, ensuring that every bite is bright rather than heavy. Whether you are a seasoned home cook or a weeknight warrior, this recipe provides a foolproof path to a restaurant-quality meal.

Why This Zesty One-Pan Chicken Recipe Works
- The Acid-Fat Balance: The vinegar-based brine from the pepperoncinis acts as a natural deglazing agent and flavor enhancer, preventing the cream sauce from tasting flat.
- Textural Contrast: We achieve a hard sear on the chicken breast medallions to create a “fond” (those little brown bits), which provides a savory anchor for the velvety ivory sauce.
- Visual Vibrancy: The combination of cracked black pepper and fresh parsley provides a professional-level garnish that makes the dish pop against the dark cast iron.
- Efficiency: Using a single skillet means minimal cleanup and maximum flavor retention, as the sauce builds directly upon the juices left by the chicken.
Essential Ingredients for the Perfect Ivory Cream Sauce
Chicken Breast Medallions: We use 1.5 lbs (680g) of boneless, skinless chicken breasts sliced into 1/2-inch (1.3cm) thick rounds. Slicing them into medallions ensures rapid, even cooking and maximizes the surface area for that gorgeous golden-brown sear.
Pickled Pepperoncini Peppers: You will need 1/2 cup (65g) of sliced pepper rings plus 2 tbsp (30ml) of the brine from the jar. These peppers provide a mild heat and a signature tang that defines the entire Pepperoncini Chicken Skillet experience.
Heavy Whipping Cream: 1 cup (240ml) of high-fat cream is essential for achieving that “thick ivory” consistency described in our visual blueprint. It creates a stable emulsion that won’t break when hit with the acidic pepper brine.
Chicken Bone Broth: 1/2 cup (120ml) of low-sodium chicken broth adds depth and allows the sauce to simmer without becoming overly thick or salty. If you prefer a more herbaceous base, you might consider using a Mediterranean-inspired broth base for future variations.
Fresh Flat-Leaf Parsley: A 1/4 cup (10g) handful of finely chopped parsley is non-negotiable for that “vibrant green” garnish. It adds a necessary earthy freshness to the finished skillet.
Unsalted Butter and Oil: We use 1 tbsp (15g) of unsalted butter for gloss and 1 tbsp (15ml) of high-smoke point oil (like avocado or grapeseed) to achieve the perfect sear without burning the fats.
Aromatics and Seasoning: 3 cloves of minced garlic, 1/2 tsp (3g) of kosher salt, and a generous 1 tsp (2g) of freshly cracked black pepper. The black pepper should be coarse to provide the visual “speckled” look seen in the prompt.
Must-Have Tools for the Professional Home Cook
To achieve the rustic, “slightly messy edge” look of a perfect Pepperoncini Chicken Skillet, a 12-inch (30cm) black cast iron skillet is the gold standard. Cast iron retains heat better than stainless steel, allowing for a superior Maillard reaction on the chicken medallions.
You will also need a high-quality chef’s knife for precise parsley chopping and a set of stainless steel tongs. Tongs allow you to flip the chicken medallions individually, ensuring that each piece achieves that specific “golden-brown” visual cue without tearing the delicate meat.

A Step-by-Step Guide to the Pepperoncini Chicken Skillet
Step 1: Achieving the Perfect Golden Sear
Pat the chicken medallions completely dry with paper towels; moisture is the enemy of a good sear. Season them generously with salt and half of the cracked black pepper. Heat your cast iron skillet over medium-high heat with the oil until it begins to shimmer.
Place the medallions in the skillet in a single layer, ensuring they do not touch. Sear for 3-4 minutes per side until a deep golden-brown crust forms. Remove the chicken to a plate, leaving the rendered fat and brown bits in the pan.
Step 2: Building the Aromatic Base
Reduce the heat to medium and add the butter to the skillet. Once melted, toss in the minced garlic and half of the sliced pepperoncinis. Sauté for 60 seconds until the garlic is fragrant and the peppers just begin to soften.
This is where the sensory cues come in: listen for a gentle sizzle and look for the garlic to turn a pale straw color. Do not let it turn dark brown, as this will ruin the ivory color of your final sauce.
Step 3: Deglazing and Emulsifying the Sauce
Pour in the 2 tbsp (30ml) of pepperoncini brine and use a wooden spoon to scrape up all those flavorful brown bits from the bottom of the skillet. This is a critical culinary step that incorporates the “seared” flavor into the liquid.
Slowly whisk in the chicken broth and the heavy cream. Bring the mixture to a gentle simmer. You will notice the sauce beginning to thicken and take on a beautiful, glossy, pale-ivory hue. Let it reduce for 3-5 minutes until it coats the back of a spoon.
Step 4: The Final Assembly
Slide the seared chicken medallions back into the skillet, along with any juices that collected on the plate. Add the remaining pepperoncini rings and simmer for another 2 minutes to ensure the chicken is heated through and the flavors have married.
The chicken should be partially submerged in the thick sauce, just like in our visual blueprint. Turn off the heat before the cream separates or reduces too far.
Step 5: The Signature Garnish
Just before serving, shower the skillet with the freshly chopped flat-leaf parsley and the remaining cracked black pepper. The “handheld smartphone photo” aesthetic is achieved by being slightly messy with the garnish—let some parsley fall onto the edges of the skillet for that rustic appeal.
Expert Tips for a Flawless Skillet Dinner
- Room Temperature Meat: Take your chicken out of the fridge 15 minutes before cooking. This ensures the center reaches the safe internal temperature of 165°F (74°C) at the same time the outside reaches golden perfection.
- Don’t Crowd the Pan: If your skillet is small, sear the chicken in two batches. Overcrowding causes the chicken to steam rather than sear, resulting in a grey color instead of golden-brown.
- Sauce Consistency: If your sauce becomes too thick, whisk in a tablespoon of broth. If it’s too thin, let it simmer for an extra minute before adding the chicken back in.
- Control the Heat: Pepperoncinis vary in heat. For a spicier Pepperoncini Chicken Skillet, add a teaspoon of the crushed red pepper flakes from the jar.
How to Store and Reheat Your Leftovers
This Pepperoncini Chicken Skillet stores beautifully in an airtight container in the refrigerator for up to 3 days. Because it contains heavy cream, we do not recommend freezing this dish, as the sauce may break and become grainy upon thawing.
To reheat, place the chicken and sauce in a small pan over low heat. Add a splash of water or milk to loosen the sauce as it warms. Avoid the microwave if possible, as it can toughen the chicken medallions and cause the cream to separate.
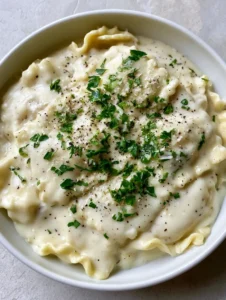
What to Serve with Your Pepperoncini Chicken
The thick, ivory sauce in this recipe begs to be soaked up by a starchy side. A bed of buttered noodles or creamy mashed potatoes is a classic choice. For a lighter option, consider serving it alongside crispy air fryer zucchini or a simple Italian-style pasta salad for a full Mediterranean-inspired spread.
If you are looking for more chicken inspiration after mastering this skillet, our Chimichurri Grilled Chicken offers a similarly bright and punchy flavor profile that is perfect for meal prepping.
Frequently Asked Questions
You can substitute the heavy cream with full-fat canned coconut milk, though it will add a slight coconut flavor. Use a dairy-free butter alternative or more oil for sautéing.
Absolutely! Boneless, skinless chicken thighs work very well in this skillet. They may require 2-3 extra minutes of cooking time per side, but they remain very juicy in the cream sauce.
Use full-fat heavy whipping cream and ensure you are simmering on medium heat rather than boiling vigorously. The high fat content and stable temperature prevent the sauce from breaking.
No, pickled pepperoncinis are quite mild. Most of the flavor comes from the tangy vinegar brine rather than heat. If you want it spicier, you can add red pepper flakes or use ‘hot’ pickled peppers.
A heavy-bottomed stainless steel or non-stick skillet will work. However, cast iron is preferred for achieving the specific deep golden-brown sear on the chicken medallions.
The Ultimate Pepperoncini Chicken Skillet Recipe

Pepperoncini Chicken Skillet with Creamy Garlic Sauce
Ingredients
Equipment
Method
- Pat chicken medallions dry and season with salt and half the pepper. Heat oil in a cast iron skillet over medium-high heat. Sear chicken for 3-4 minutes per side until golden-brown. Remove and set aside.
- Reduce heat to medium. Add butter, garlic, and half of the pepperoncinis. Sauté for 1 minute until fragrant.
- Deglaze the pan with pepper brine. Whisk in heavy cream and chicken broth. Simmer for 3-5 minutes until the sauce turns thick and ivory in color.
- Return chicken to the skillet with remaining pepperoncini rings. Simmer for 2 minutes. Garnish heavily with fresh parsley and remaining cracked black pepper.
Notes
Pat the chicken extremely dry to ensure you get a golden-brown crust rather than steamed meat.

Bringing the Rustic Kitchen Home
Mastering the Pepperoncini Chicken Skillet is about more than just following steps; it is about embracing the sensory experience of cooking. The sound of the sear, the aroma of the garlic and vinegar, and the visual beauty of the finished skillet make this a staple in any kitchen.
If you loved this recipe, please leave a comment below and let us know how yours turned out! Don’t forget to follow us on Pinterest for more visually stunning and delicious meal ideas. Happy cooking!