There is something undeniably nostalgic about a handheld pizza, but these Homemade Pizza Pockets elevate that childhood memory into a gourmet reality. Imagine biting into a crust that is shattered-glass crispy on the outside, yet tender and airy on the inside, revealing a molten core of stretchy mozzarella and savory pepperoni. These aren’t your average freezer-aisle snacks; they are a masterclass in dough hydration and flavor balancing.
Achieving the perfect Homemade Pizza Pockets requires a commitment to high-quality ingredients and specific culinary techniques. We are looking for that signature deep golden-brown finish, complete with visible air bubbles and those characteristic charred dough spots that signify a high-heat bake. The contrast between the dark red, concentrated marinara and the bright white, gooey cheese creates a visual and flavorful masterpiece.
Whether you are looking for a weekend project or the ultimate addition to your list of homemade snacks for kids, this recipe delivers on every promise. We have engineered this dough to handle the heavy lifting of gooey fillings without becoming soggy, ensuring every bite is as structural as it is delicious. Let’s dive into the science of the perfect pizza pocket.
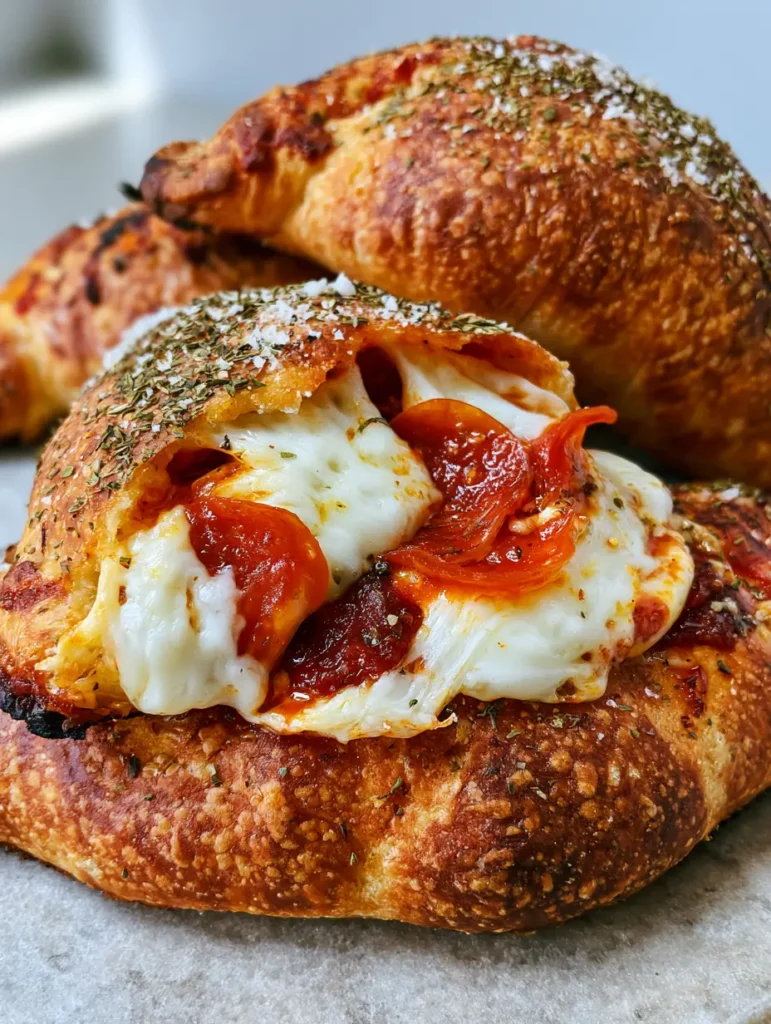
The Anatomy of an Elite Pizza Pocket: Why This Recipe Works
- The Cracker-Thin, Bubbly Crust: By using a specific hydration level and a high-heat bake, we achieve those coveted charred dough bubbles and a deep golden-brown hue.
- High-Fat Pepperoni Rendering: We use thin-sliced pepperoni that releases its flavorful oils into the cheese during the bake, creating a rich, savory mouthfeel.
- No-Soggy-Bottom Logic: By using a thick, reduced marinara sauce rather than a watery one, the integrity of the bottom crust remains perfectly crispy.
- Aromatic Finishing Touches: A dusting of fine green dried oregano and grated parmesan cheese provides an immediate hit of umami and herbal notes the moment the pocket hits your tongue.
The Essential Pantry Staples for Pizza Perfection
Every ingredient in these Homemade Pizza Pockets serves a structural and flavor-driven purpose. To achieve the visual result seen in professional artisanal bakes, we must be precise with our selections.
High-Protein Bread Flour: 3 cups (375g). Bread flour provides the gluten structure necessary to hold in the steam and expanding cheese without bursting. If you want a more unique base, you could even experiment with a cottage cheese pizza crust for added protein.
Warm Water: 1 cup (240ml). Temperature is key here; aim for 110°F (43°C) to activate the yeast perfectly without killing it, ensuring those beautiful air bubbles form in the dough.
Active Dry Yeast: 2 1/4 tsp (7g). This is the engine of our dough, providing the lift and that classic fermented “pizza shop” aroma that fills your kitchen.
Extra Virgin Olive Oil: 2 tbsp (30ml). Olive oil tenderizes the crumb and is essential for brushing the exterior to achieve that deep golden-brown, charred finish.
Low-Moisture Mozzarella Cheese: 2 cups (225g), shredded. Low-moisture is non-negotiable here; fresh mozzarella releases too much water, which would lead to a soggy pocket and a messy blowout.
Thinly Sliced Pepperoni: 4 oz (115g). The thin slices ensure the pepperoni curls and crisps slightly even inside the dough, distributing its oils into the surrounding cheese.
Thick Marinara Sauce: 1/2 cup (120ml). Look for a “pizza sauce” or a reduced marinara that is dark red and paste-like to prevent the dough from absorbing too much moisture.
Grated Parmesan and Dried Oregano: 2 tbsp (10g) each. These are our finishing seasonings, applied post-bake (or just before finishing) to catch the light and add visual texture.
Professional Tools for a Flawless Bake
To replicate the “handheld smartphone photo” aesthetic of a perfectly charred crust, you need the right conductivity. A heavy-duty baking sheet or, ideally, a preheated pizza stone will provide the immediate bottom heat needed to “oven spring” the dough, creating those interior air pockets.
A pastry brush is also vital for an even application of olive oil, ensuring the entire surface browns uniformly. Finally, a bench scraper makes portioning the dough effortless, maintaining the gas bubbles we’ve worked so hard to develop during the rise.
Mastering the Fold: A Step-by-Step Guide to Pizza Pockets
Phase 1: Developing the Fermented Dough
In a large bowl, whisk your warm water and yeast. Let it sit for 5-10 minutes until a foamy “bloom” appears on the surface, indicating the yeast is alive and ready to work.
Gradually add the flour, salt, and olive oil. Knead by hand or with a mixer until the dough is smooth and elastic—it should “bounce back” when poked. Place in a greased bowl, cover, and let rise in a warm spot for 1 hour or until doubled in size.
Phase 2: Portioning and Filling Construction
Gently punch down the dough to release large gas bubbles. Divide the dough into 6 equal portions. On a lightly floured light gray stone surface or countertop, roll each piece into an 8-inch circle.
Spread 1 tablespoon of the thick marinara on one half of the dough, leaving a 1-inch border. Layer a generous amount of shredded mozzarella and at least 5-6 slices of pepperoni. The pepperoni should be nestled into the sauce to keep it in place.
Phase 3: The Seal and The Visual Cues
Fold the dough over the filling to create a half-moon shape. Use a fork or your fingers to crimp the edges tightly; a poor seal will result in a cheese explosion in your oven. Use a sharp knife to cut two small steam vents on top.
Brush the tops generously with olive oil. This is the secret to the “deep golden-brown” look. Sprinkle a pinch of dried oregano over the oil so it sticks to the crust during the bake.
Phase 4: The High-Heat Bake
Bake at 450°F (230°C) for 12-15 minutes. Watch for the visual cues: the dough should transform from pale white to a vibrant, deep tan. Look for “leopard spotting” or charred bubbles forming on the edges—this is where the flavor lives.
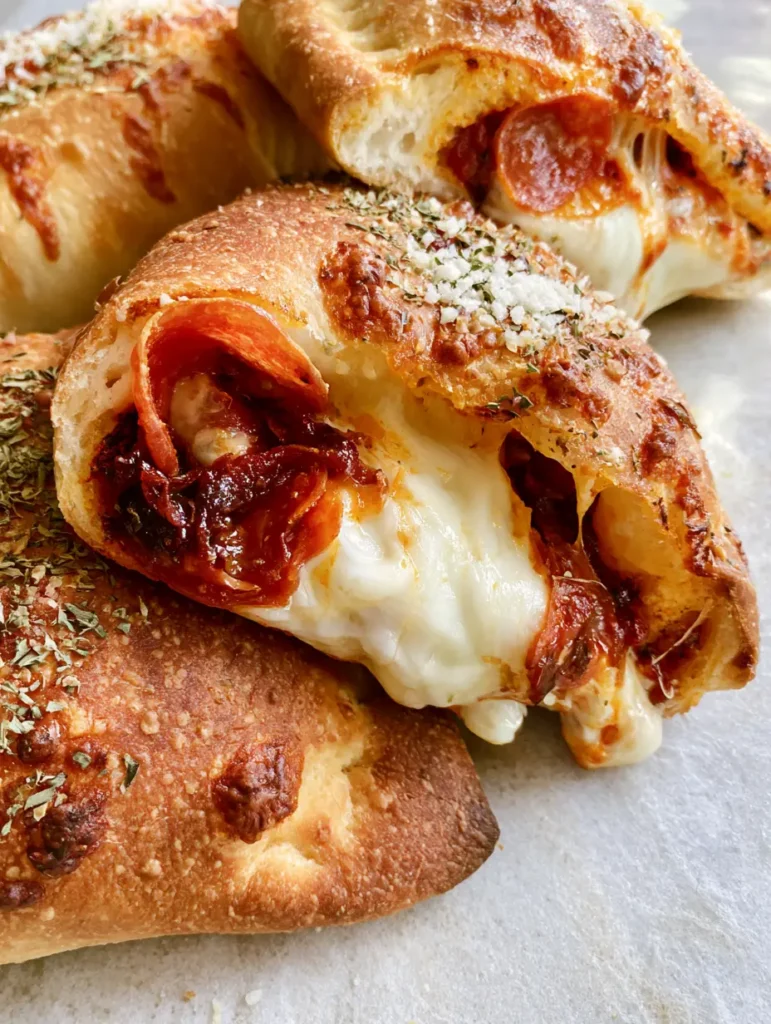
Expert Tips for Success
- The Temperature Spike: If your oven has a convection setting, use it for the last 2 minutes. This circulates hot air to ensure those charred dough bubbles are prominent and crispy.
- Don’t Over-Sauce: It’s tempting to add more marinara, but too much sauce will create steam that prevents the cheese from getting that “stretchy” pull. Serve extra sauce on the side for dipping!
- The Resting Period: Let the Homemade Pizza Pockets rest for at least 5 minutes after baking. This allows the melted mozzarella to “set” slightly so it doesn’t all run out the moment you take your first bite.
- Herb Timing: Add the grated parmesan cheese immediately after the pockets come out of the oven. The residual heat will help the cheese adhere without completely melting it, maintaining that beautiful white-on-gold visual contrast.
Optimal Storage and Reheating Methods
These pizza pockets are fantastic for meal prep. You can store baked pockets in an airtight container in the refrigerator for up to 4 days. To maintain the crispy crust, avoid the microwave; instead, reheat them in an oven or air fryer at 350°F (175°C) until the center is molten again.
For long-term storage, flash-freeze the unbaked pockets on a parchment-lined tray before transferring them to a freezer bag. You can bake them directly from frozen, adding about 5-8 minutes to the total baking time.
What to Serve With This Handheld Feast
While these Homemade Pizza Pockets are a meal in themselves, they pair beautifully with a variety of sides. For a crunchy contrast, try serving them alongside crispy homemade onion rings or a light marinated cauliflower salad (coming soon) to cut through the richness of the cheese.
If you’re hosting a game day, they fit perfectly into a spread featuring chicken street tacos or even smash burger tacos for a “handheld-only” party theme. The versatility of pizza flavors makes them a universal favorite.
Frequently Asked Questions
Absolutely! You can freeze them unbaked or baked. If unbaked, freeze on a tray then move to a bag; bake from frozen at 425°F for about 20 minutes.
Yes, store-bought dough works well. Just ensure you let it come to room temperature before rolling it out so it doesn’t snap back, allowing you to get that thin, crispy pocket structure.
High heat is essential. Bake at 450°F (230°C) and use a preheated baking sheet or pizza stone. Brushing the dough with olive oil also encourages the Maillard reaction for that deep golden color.
The key is a tight seal and steam vents. Crimp the edges firmly with a fork and ensure you cut 1-2 small slits on top to allow steam to escape, which prevents the pressure from blowing out the sides.
Low-moisture, whole-milk mozzarella provides the best stretch and flavor. Avoid pre-shredded cheese if possible, as the anti-caking agents can prevent the cheese from melting into a cohesive, stretchy mass.
The Ultimate Homemade Pizza Pockets Recipe
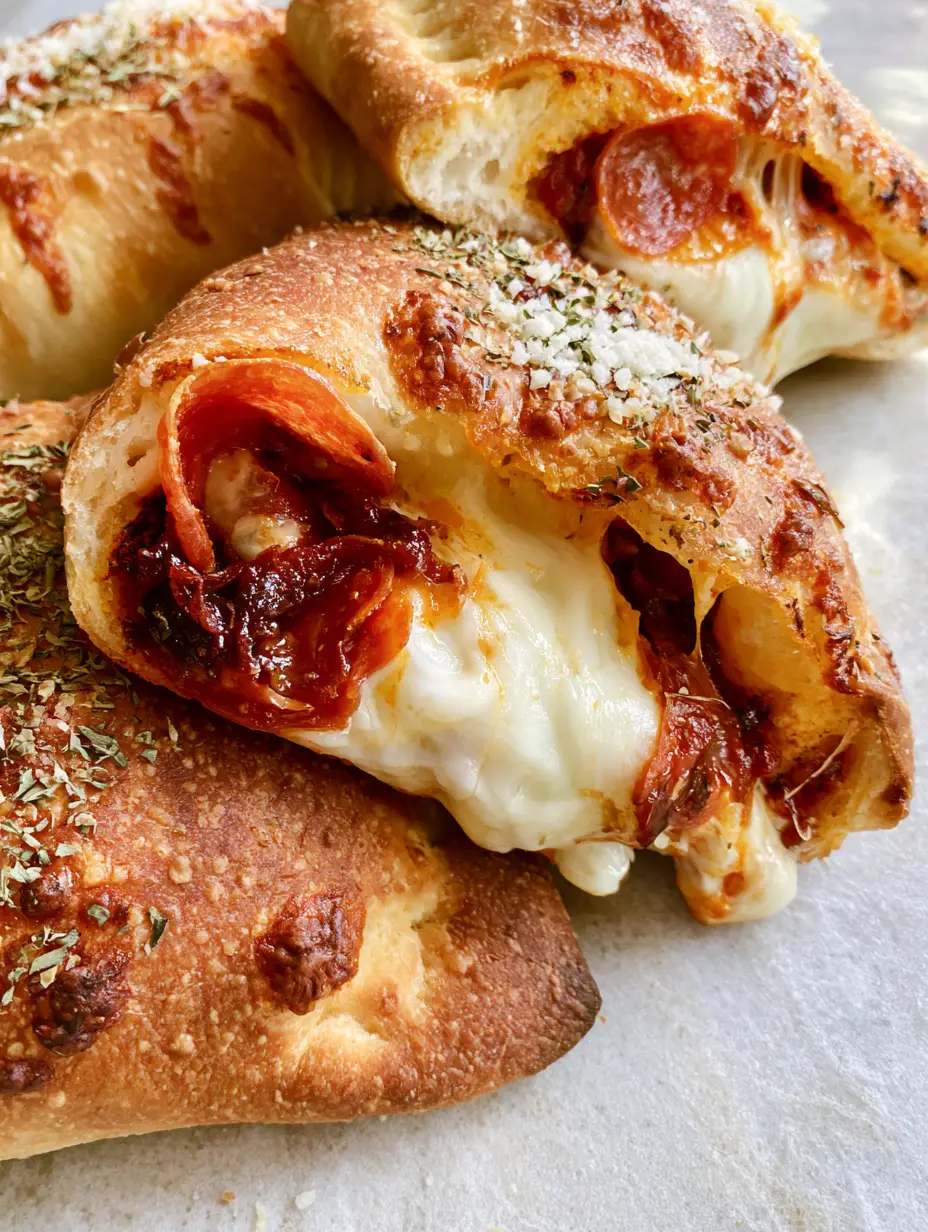
Homemade Pizza Pockets: The Ultimate Crispy, Cheesy Handheld Recipe
Ingredients
Equipment
Method
- Combine warm water and yeast in a bowl; let sit for 5-10 minutes until foamy.
- Mix in flour, salt, and olive oil. Knead for 8 minutes until smooth and elastic.
- Cover and let rise in a warm place for 1 hour until doubled in size.
- Divide dough into 6 balls. Roll each into an 8-inch circle. Add sauce, cheese, and pepperoni to one half.
- Fold dough over and crimp edges with a fork. Cut two steam vents in the top.
- Brush with olive oil and sprinkle with oregano. Bake at 450°F (230°C) for 12-15 minutes until deep golden-brown with charred bubbles.
- Remove from oven and immediately sprinkle with grated parmesan cheese.
Notes
Preheating your baking sheet will result in a crispier bottom crust.

Wrap Up: Your Journey to the Perfect Pizza Pocket
Making Homemade Pizza Pockets at home is more than just a recipe; it’s a way to control the quality of your ingredients and achieve a level of crispiness that store-bought versions simply can’t match. From the oily pepperoni rounds to the fine green oregano flakes, every detail contributes to a superior eating experience. Don’t forget to follow us on Pinterest for more culinary inspiration!
We’d love to hear how your bake turned out! Did you get those perfect charred bubbles? Leave a comment below and share your photos with the Kitchen Spark community. Happy baking!


