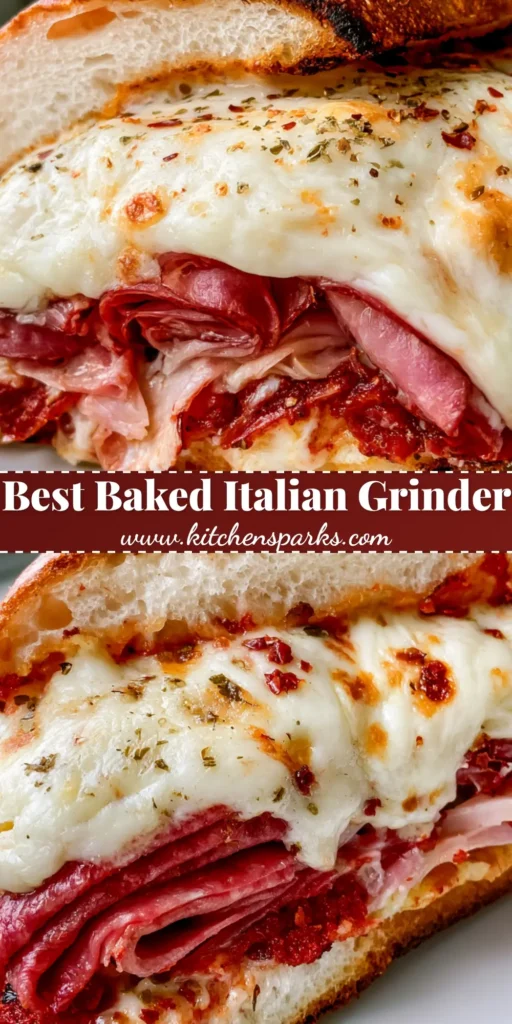
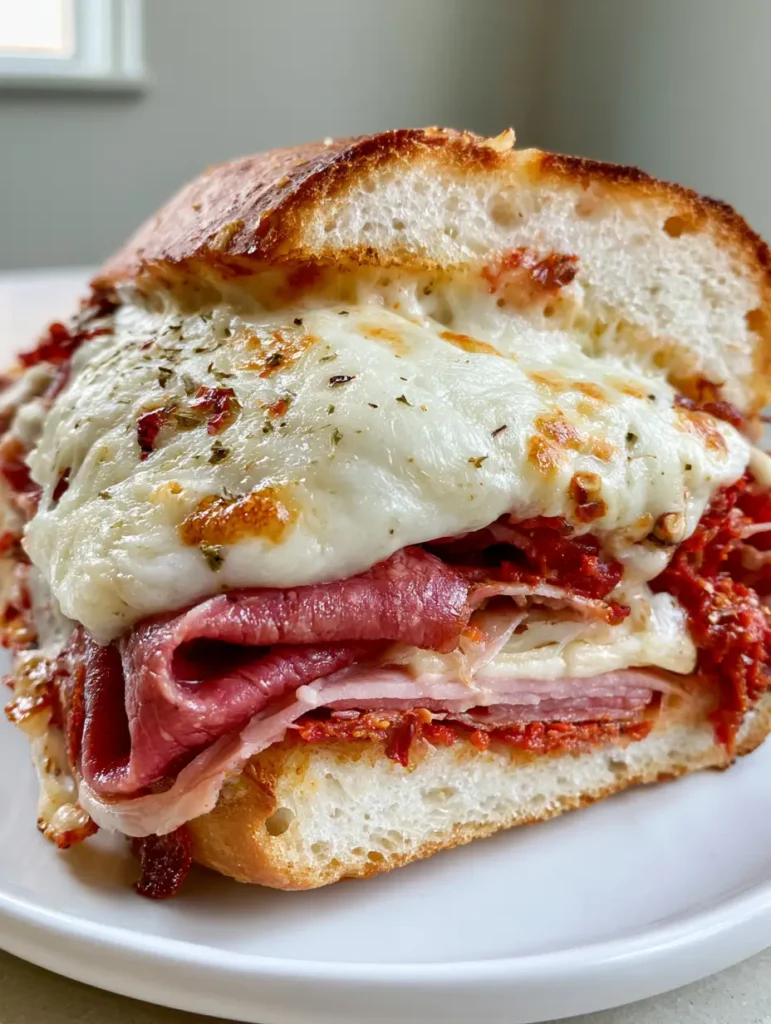
The Baked Italian Grinder is more than just a sandwich; it is a masterclass in contrasting textures and bold, savory flavors. Imagine biting into a toasted hoagie roll that shatters with a satisfying crunch, revealing a cloud-soft interior packed with layers of premium Italian meats. As you reach the center, you are met with a heavy blanket of bubbly, golden-brown mozzarella that stretches with every pull, seasoned to perfection with aromatic herbs.
This recipe transforms the traditional cold deli sub into a hot, gourmet experience that rivals the best East Coast sub shops. By using a specific layering technique and high-heat baking, we ensure that every slice of salami, ham, and pepperoni is heated through while the bread maintains its structural integrity. Whether you are prepping a quick weeknight dinner or looking for the star of your next game-day spread, this sandwich delivers on every sensory promise.
In this guide, we will dive deep into the culinary science of the perfect grinder, from the moisture content of your deli cuts to the specific Maillard reaction required for that iconic bubbly cheese. You will learn how to achieve the exact visual results seen in our professional kitchen—a sandwich that looks as incredible as it tastes.
Why This Hot Italian Sub Recipe Works
- Structural Integrity: The toasted hoagie roll provides a “crunch-to-chew” ratio that supports heavy meats without becoming soggy.
- Aromatic Depth: Adding dried oregano and red pepper flakes after the cheese begins to melt allows the oils in the herbs to bloom without burning.
- Folded Meat Technique: Folding the Genoa salami creates small air pockets that trap heat and steam, ensuring the meat is tender rather than a flat, dense block.
- Bubbly Mozzarella Finish: Using low-moisture, whole-milk mozzarella ensures a thick, gooey melt with those signature golden-brown toasted spots.
The Anatomy of a Perfect Baked Italian Grinder
Every ingredient in the Baked Italian Grinder serves a specific purpose in both flavor profile and visual presentation. To achieve the elite results shown in our photography, it is essential to select high-quality components that react correctly under heat.
The Foundation: Hoagie Rolls
You need a sturdy 10-inch (25cm) hoagie roll. A roll that is too soft will collapse under the weight of the melted cheese, while one that is too hard will be difficult to eat once toasted. Look for “Italian-style” rolls with a fine crumb and a slightly dusty, floury exterior.
The Meats: A Trifecta of Italian Flavors
We use a combination of Genoa salami, thin-sliced deli ham, and spicy pepperoni. The salami provides a fermented, tangy richness; the ham adds a salt-cured sweetness; and the pepperoni brings a hit of paprika-infused spice and essential oils that season the cheese from beneath.
The “Glue”: Whole Milk Mozzarella
Avoid pre-shredded cheese if possible. Freshly grated low-moisture mozzarella has a higher fat content and lacks the anti-clumping cellulose found in bags, resulting in a much smoother, bubblier melt. This is what creates those “toasted spots” that make the Baked Italian Grinder so visually irresistible.
The Finishers: Oregano and Crushed Red Pepper
These aren’t just garnishes. The dried oregano provides an earthy, floral note that cuts through the richness of the fats, while the red pepper flakes offer a controlled heat that lingers on the palate.
Essential Kitchen Tools for Sandwich Success
To recreate this Baked Italian Grinder with forensic accuracy, you don’t need a commercial kitchen, but a few specific tools will make the process seamless.
- Baking Sheet with Wire Rack: Placing a rack over the sheet allows hot air to circulate under the roll, ensuring the bottom is just as crispy as the top.
- Serrated Bread Knife: Crucial for that clean, diagonal cross-section cut without crushing the layers of meat and cheese.
- Aluminum Foil: Useful for “tenting” the sandwich if the bread is browning faster than the cheese is melting.
- Kitchen Scale: For those who want absolute precision in meat-to-cheese ratios (optional but recommended).
Step-by-Step Instructions for the Perfect Melt
Preparing the Bread and Foundation
Preheat your oven to 400°F (200°C). Position your oven rack in the center for even heat distribution. Take your 10-inch (25cm) hoagie roll and use a serrated knife to slice it lengthwise. Be careful not to cut all the way through; you want a “hinge” that keeps the sandwich together. Open the roll and place it on your baking sheet.
Optional: Spread a thin layer of 1 tbsp (14g) of softened salted butter or a drizzle of extra virgin olive oil on the interior of the bread. This creates a fat barrier that prevents the juices from the meat from soaking into the bread fibers, ensuring it stays soft on the inside and crispy on the outside.
The Art of Layering the Meats
Begin with the Genoa salami. Take each slice and fold it into a loose “S” shape before placing it on the bottom half of the roll. Use approximately 3 oz (85g) of salami. This folding technique is the secret to a voluminous, airy sandwich. Repeat this with 3 oz (85g) of thin-sliced deli ham, draping it over the salami.
Finally, layer 1.5 oz (42g) of sliced pepperoni over the ham. The pepperoni should be the top layer of meat so that its natural oils can render directly into the cheese during the baking process. This creates a beautiful orange-hued “lava” effect beneath the mozzarella.
Mastering the Melt and Toast
Cover the layers of meat with 4 oz (113g) of freshly grated mozzarella cheese. Ensure the cheese extends all the way to the edges of the bread to create a protective seal. Slide the tray into the oven and bake for 8-10 minutes. Watch for the visual cue: the cheese should be fully melted and just beginning to form small, golden-brown bubbles.
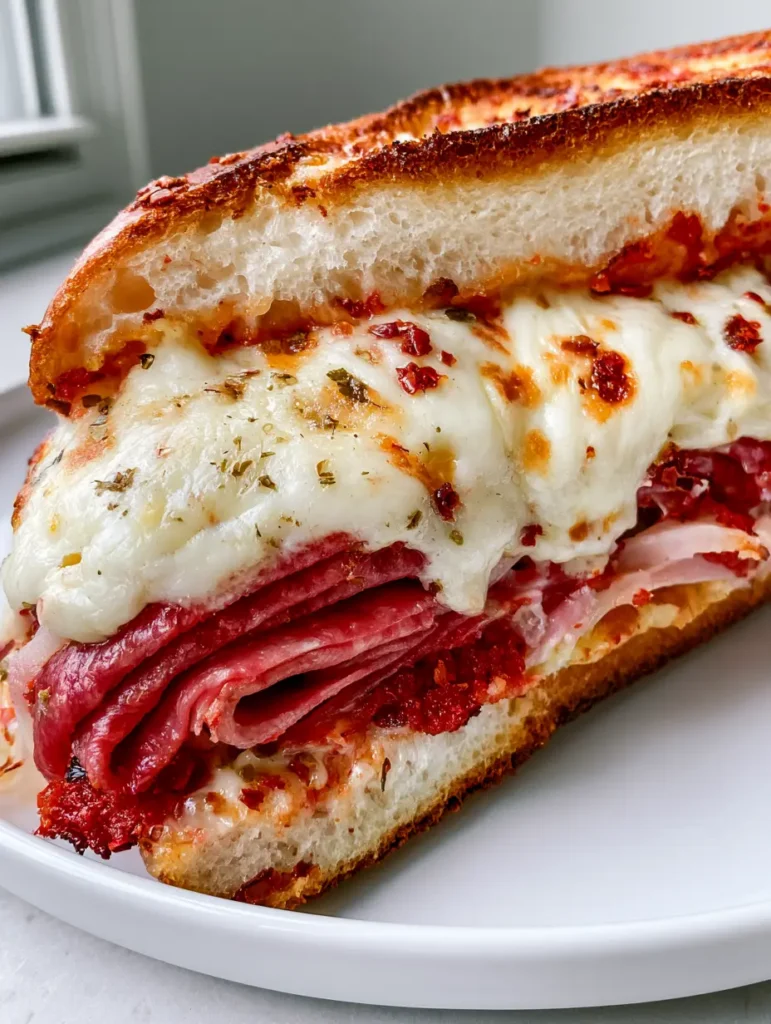
For the final 60 seconds, you can switch the oven to the “Broil” setting. This will intensify the “bubbly” appearance and create those dark toasted spots seen in the Baked Italian Grinder visual blueprint. Stay close to the oven, as this happens very quickly!
The Fragrant Finish and Slicing
Remove the sandwich from the oven. Immediately sprinkle 1 tsp (1g) of dried oregano and 1/2 tsp (1g) of crushed red pepper flakes over the molten cheese. The residual heat will “wake up” the dried herbs, releasing their fragrance into the air. Let the sandwich rest for 2 minutes; this allows the cheese to set slightly, preventing it from sliding off when you cut it.
Place the sandwich on a cutting board. Using a swift, diagonal motion with your serrated knife, slice the grinder in half. This diagonal cut maximizes the surface area of the cross-section, showing off the dense layers of folded meats and the thick crown of mozzarella.
Expert Tips for Culinary Excellence
- Temperature Control: Ensure your deli meats are at room temperature for 15 minutes before assembling. Cold meat can prevent the cheese from melting properly in the center.
- The Foil Trick: If you prefer a softer roll but want very bubbly cheese, wrap the bottom and sides of the roll in foil, leaving only the cheese-topped meat exposed to the direct heat.
- Herb Timing: Never put the herbs on before baking for long periods. The high heat of the oven can turn dried oregano bitter. Adding them at the very end preserves their sweetness.
- Moisture Management: If using ham that seems particularly “wet,” pat it dry with a paper towel before layering. Excess moisture is the enemy of a crispy Baked Italian Grinder.
Perfect Pairings: What to Serve with Your Grinder
A sandwich this robust needs sides that offer a bright or crunchy contrast. To stay within the Italian theme, consider serving this with a vibrant Italian Tomato Bruschetta as an appetizer to whet the appetite. The acidity of the tomatoes cuts through the fatty meats perfectly.
If you are serving a crowd, a chilled pasta dish is the traditional choice. Our Italian Bow Tie Pasta Salad or a classic Mediterranean Pasta Salad provides a refreshing, vinegary counterpoint to the hot, salty sandwich. For those who want a bit of a spicy kick on the side, a serving of Mexican Street Corn offers a creamy, charred flavor profile that surprisingly complements the toasted pepperoni.
Finally, if you’re looking for a lighter, crunchier side, you can’t go wrong with a Marinated Cauliflower Salad (coming soon). The tang of the marinade acts as a palate cleanser between bites of the rich, cheesy grinder.
Frequently Asked Questions
You can assemble the meats and bread ahead of time, but wait to add the cheese and bake until just before serving to ensure the bread stays crispy and the cheese is molten.
To prevent sogginess, toast the interior of the bread first with a little butter or oil to create a moisture barrier, and ensure you pat your deli meats dry if they have excess brine.
Low-moisture, whole-milk mozzarella is the gold standard for its superior meltability and ability to form golden-brown ‘toasted’ spots under high heat.
While both use similar long rolls and Italian meats, a ‘hoagie’ is typically served cold, whereas a ‘grinder’ is traditionally toasted or baked until the cheese is melted and the bread is crispy.
Folding the meat creates air pockets that allow heat to circulate through the sandwich more effectively, resulting in a lighter, more tender bite than flat, compressed layers.
The Ultimate Baked Italian Grinder Recipe
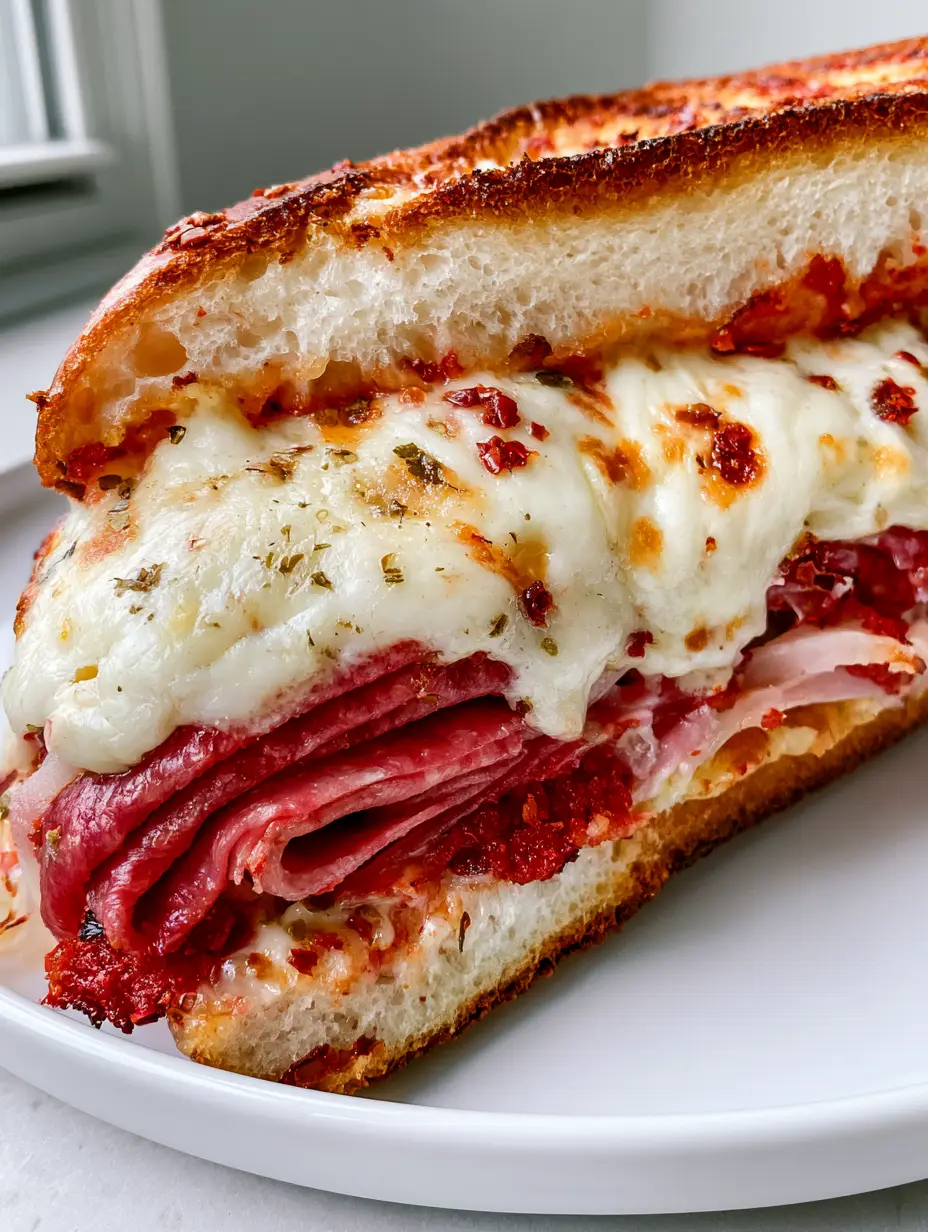
Baked Italian Grinder: The Ultimate Crispy, Melty Deli Classic
Ingredients
Equipment
Method
- Preheat oven to 400°F (200°C). Split the hoagie roll lengthwise, keeping the hinge intact, and place on a baking sheet. Optionally spread butter on the interior.
- Fold the Genoa salami into 'S' shapes and layer on the roll. Add ham, then top with pepperoni slices.
- Cover the meats with a heavy layer of mozzarella. Bake for 8-10 minutes until cheese is bubbly and bread is golden. Broil for 60 seconds for toasted spots.
- Remove from oven, sprinkle with oregano and red pepper flakes. Rest for 2 minutes, then slice diagonally.
Notes
Freshly grating your mozzarella ensures a much better melt than pre-shredded cheese.
Join the Kitchen Spark Community
The Baked Italian Grinder is a testament to how simple ingredients, when treated with the right techniques, can create a world-class meal. We hope this sandwich becomes a staple in your home just as it has in ours. The combination of crispy bread, savory folded meats, and that unmistakable bubbly mozzarella is a winner every single time.
Did you make this recipe? We would love to hear how it turned out! Leave a comment below and let us know your favorite deli meat combination. Don’t forget to sign up for our newsletter for more professional-grade recipes delivered straight to your inbox. If you loved the photos, be sure to share this recipe and follow us on Pinterest for daily culinary inspiration!