Fried Gnocchi is the ultimate culinary shortcut that delivers restaurant-quality results in under twenty minutes. This dish transforms humble potato dumplings into golden-brown, crispy treasures with a pillowy-soft interior that melts in your mouth.
By skipping the traditional boiling pot and heading straight for the skillet, you unlock a depth of flavor and texture that boiled gnocchi simply cannot achieve. The secret lies in the Maillard reaction, which creates a toasted crust that perfectly grips a glossy garlic butter sauce.
Whether you are looking for a quick weeknight dinner or a sophisticated side dish, these pan-seared dumplings are guaranteed to become a staple in your kitchen rotation. Let’s dive into how to achieve that perfect, handheld-photo-worthy finish every single time.

Why This Pan-Seared Method Rules Your Kitchen
- Unbeatable Texture: You get a distinct toasted golden-brown crust with visible sear marks while maintaining a pillowy, tender center.
- Glossy Butter Finish: The translucent melted butter sauce pools slightly at the bottom, creating a rich mouthfeel in every bite.
- Aromatic Depth: Sautéed minced garlic and dried parsley flakes provide a savory punch that balances the richness of the butter.
- Umami Bomb: A heavy dusting of finely grated white parmesan cheese melts into the crevices of the hot gnocchi for a salty, cheesy finish.
Essential Components for Crispy Fried Gnocchi Perfection
To achieve the visual and textural results seen in professional culinary photography, every ingredient must serve a specific purpose. Here is what you need to gather.
1 lb (450g) Potato Gnocchi: Use shelf-stable or refrigerated potato gnocchi for the best structural integrity during the high-heat searing process. These dumplings are dense enough to develop a crust without falling apart.
3 tbsp (42g) Unsalted Butter: Butter provides the fat needed for browning and forms the base of our glossy sauce. Using unsalted allows you to control the final seasoning perfectly.
2 tbsp (30ml) Extra Virgin Olive Oil: Olive oil has a higher smoke point than butter, allowing us to sear the gnocchi at high heat without burning the milk solids in the butter. It is the secret to those deep sear marks.
3 Cloves Garlic, Minced: Fresh garlic is essential; it should be finely minced so it softens and becomes translucent in the butter without turning bitter or crunchy.
1/4 cup (25g) Finely Grated Parmesan Cheese: Use a microplane to achieve a snow-like consistency. This allows the cheese to melt instantly into the nooks and crannies of the seared dumplings.
1 tsp (1g) Dried Parsley Flakes: Dried parsley provides a consistent, vibrant green garnish and a subtle earthy flavor that complements the garlic butter perfectly.
1/2 tsp (3g) Sea Salt and 1/4 tsp (1g) Black Pepper: These foundational seasonings enhance the natural potato flavor and the richness of the dairy.
The Pro-Level Tool Kit for Searing Gnocchi
Achieving the perfect Fried Gnocchi requires the right equipment to manage heat distribution and surface contact. A heavy-bottomed skillet is your best friend here.
A 12-inch (30cm) Cast Iron Skillet or a high-quality Stainless Steel Pan is preferred. These materials retain heat exceptionally well, ensuring that the gnocchi sears rather than steams. If you use a non-stick pan, ensure it is PFOA-free and rated for medium-high heat.
You will also need a wide metal spatula for flipping the dumplings effectively and a microplane grater for that signature heavy dusting of parmesan cheese that coats the dish like a blanket of flavor.

Mastering the Golden Sear: A Step-by-Step Guide
Preparing the Skillet for High-Heat Action
Place your skillet over medium-high heat and add the olive oil and 1 tablespoon (14g) of the butter. Wait for the butter to foam and then subside. This visual cue tells you the water has evaporated and the fat is hot enough to begin the searing process.
Gently add the gnocchi to the pan in a single layer. Do not overcrowd the pan; if necessary, work in batches to ensure every dumpling has direct contact with the hot surface.
Achieving the Signature Golden-Brown Crust
Leave the gnocchi undisturbed for 3-4 minutes. You are looking for a deep, toasted golden-brown crust with visible sear marks. Use your spatula to peek at one; if it looks like toasted bread, it’s time to toss them.
Flip the gnocchi and cook for another 2-3 minutes. The dumplings will puff up slightly, becoming “pillowy” while the exterior remains crisp. This contrast is the hallmark of a perfectly fried dumpling.
Infusing the Garlic Butter Sauce
Lower the heat to medium and add the remaining 2 tablespoons (28g) of butter and the minced garlic. Stir constantly for about 60 seconds. You want to hear a gentle sizzle, not a frantic pop.
The garlic should become softened and translucent, releasing its aroma into the butter. The butter will begin to look glossy and translucent, pooling slightly at the bottom of the pan as it emulsifies with the residual moisture from the gnocchi.
The Final Flourish: Cheese and Garnish
Remove the pan from the heat. Sprinkle the dried parsley flakes and the sea salt over the gnocchi, tossing once more to coat. Transfer the gnocchi to a shallow dark ceramic bowl to make the colors pop.
While the gnocchi is piping hot, apply a heavy dusting of finely grated parmesan cheese. Watch as some of the cheese melts into the crevices while the rest stays light and airy on top, exactly like a professional food styling shot.
Expert Tips for Fried Gnocchi Success
- Dry is Best: If your gnocchi feels damp out of the package, pat them dry with a paper towel. Moisture is the enemy of a crispy crust; it creates steam instead of a sear.
- Don’t Boil First: Many recipes suggest boiling before frying, but for this specific “toasted” look, frying from raw (or straight from the package) results in a much better texture.
- Controlled Garlic Heat: Garlic burns quickly. Always add it at the end of the cooking process when you lower the heat to ensure it stays sweet and soft rather than bitter and burnt.
- The Butter Emulsion: If the sauce looks too oily, add a teaspoon of water and toss vigorously. The starch from the gnocchi will help the butter and oil emulsify into a creamy, glossy coating.
Storage, Reheating, and Make-Ahead Advice
Fried Gnocchi is best enjoyed immediately to appreciate the contrast between the crispy shell and soft interior. However, if you have leftovers, they can be stored in an airtight container in the refrigerator for up to 3 days.
To reheat, avoid the microwave as it will make the gnocchi rubbery. Instead, place them back in a dry skillet over medium heat for 4-5 minutes, tossing occasionally until the exterior crisps up again and the center is warmed through.
We do not recommend freezing the gnocchi after they have been fried, as the texture of the potato and the butter sauce will degrade significantly upon thawing.
What to Serve with Crispy Fried Gnocchi
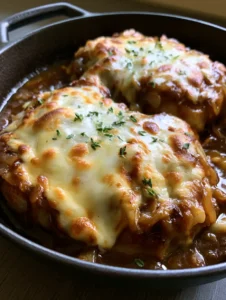
This dish is incredibly versatile. For a full Italian-inspired spread, consider pairing it with a protein like garlic butter chicken or a fresh salad.
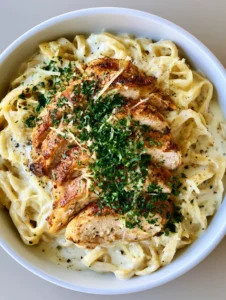
If you want to lean into the indulgence, serve these as a side to steak quesadillas for a fusion feast, or even alongside a bowl of rich chicken alfredo for the ultimate carb-lover’s dream.
For a lighter option, a side of roasted vegetables or zesty shrimp skewers provides a great contrast to the rich, buttery gnocchi.
Fried Gnocchi Frequently Asked Questions
Absolutely. Simply substitute the butter for a high-quality vegan butter alternative and use a vegan parmesan or nutritional yeast for the topping.
Yes, you can fry frozen gnocchi. You may need to add 2-3 extra minutes to the initial searing time to ensure the centers are fully thawed and pillowy.
No, for the best crispy texture and golden-brown crust, you should fry gnocchi straight from the package. Boiling them first adds unnecessary moisture which prevents a proper sear.
A combination of olive oil and butter is best. The olive oil prevents the butter from burning at high temperatures, while the butter provides the signature glossy flavor.
Sticking usually happens if the pan isn’t hot enough or if you try to flip them too early. Wait for the toasted crust to form; the gnocchi will naturally release from the pan when ready.
The Ultimate Fried Gnocchi Recipe Card

Fried Gnocchi with Crispy Garlic Butter and Parmesan
Ingredients
Equipment
Method
- Heat 1 tbsp (14g) butter and 2 tbsp (30ml) olive oil in a large skillet over medium-high heat until the butter stops foaming.
- Add gnocchi in a single layer. Cook undisturbed for 3-4 minutes until a toasted golden-brown crust and sear marks form. Flip and cook for 2 more minutes.
- Lower heat to medium. Add remaining 2 tbsp (28g) butter and minced garlic. Sauté for 1 minute until garlic is softened and butter is glossy and translucent.
- Remove from heat. Toss with salt and dried parsley. Transfer to a bowl and finish with a heavy dusting of finely grated parmesan cheese.
Notes
Do not boil the gnocchi beforehand; frying them raw creates the best texture.

Join the Kitchen Community
We hope this Fried Gnocchi recipe brings a touch of gourmet flair to your home kitchen. The combination of the golden-brown crust and that glossy garlic butter is a sensory experience you won’t soon forget.
If you enjoyed this recipe, please leave a comment below and let us know how your sear turned out! Don’t forget to sign up for our newsletter for more culinary secrets and share this post with your fellow home cooks on Pinterest.
Happy cooking, and may your gnocchi always be perfectly golden!
Check out our latest obsession: The Ultimate Cowboy Butter—it’s the perfect dipping sauce for these crispy dumplings!