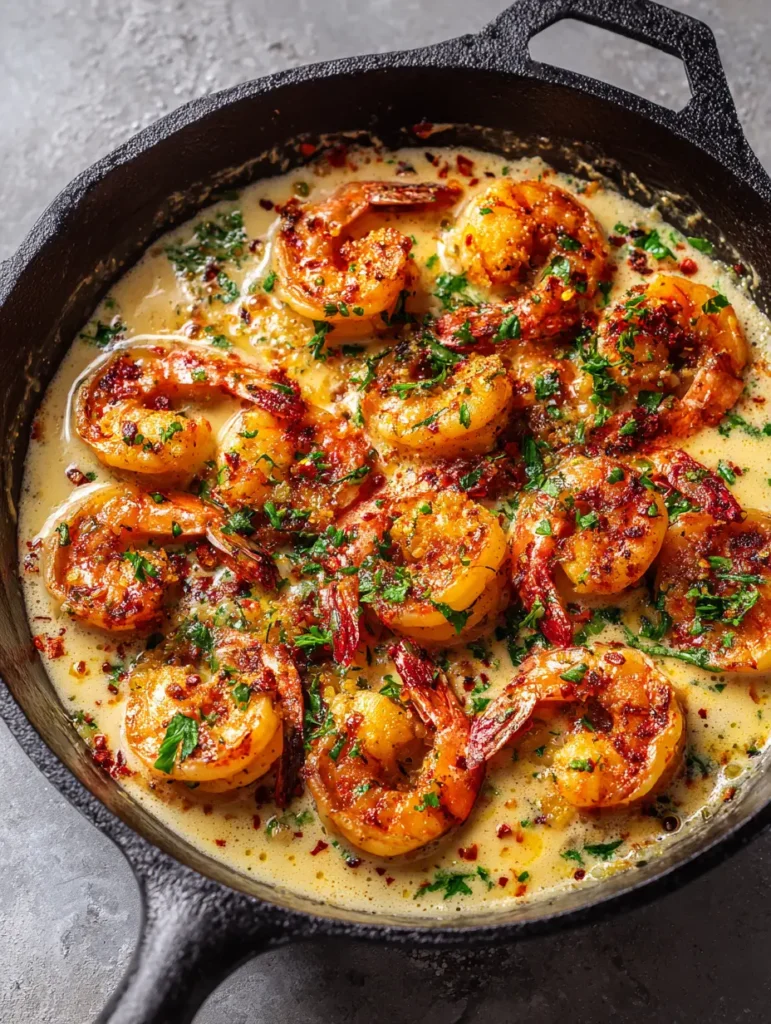
There is a specific culinary magic that happens when high-heat searing meets the velvety, tropical richness of a reduction sauce. This Creamy Coconut Garlic Shrimp is the embodiment of that synergy, delivering a restaurant-quality experience in a single black cast iron skillet. We aren’t just making a quick dinner; we are building layers of flavor—from the deep umami of charred crusts on jumbo shrimp to the aromatic sweetness of golden-brown minced garlic.
If you have ever scrolled through food photography and wondered how to achieve those perfectly curled, vibrant pink prawns nestled in a thick, ivory-toned sauce, you are in the right place. This recipe is designed to bridge the gap between “home cooking” and “culinary art.” By following specific temperature controls and ingredient sequencing, you will produce a dish that looks exactly like a professional food stylist’s masterpiece.
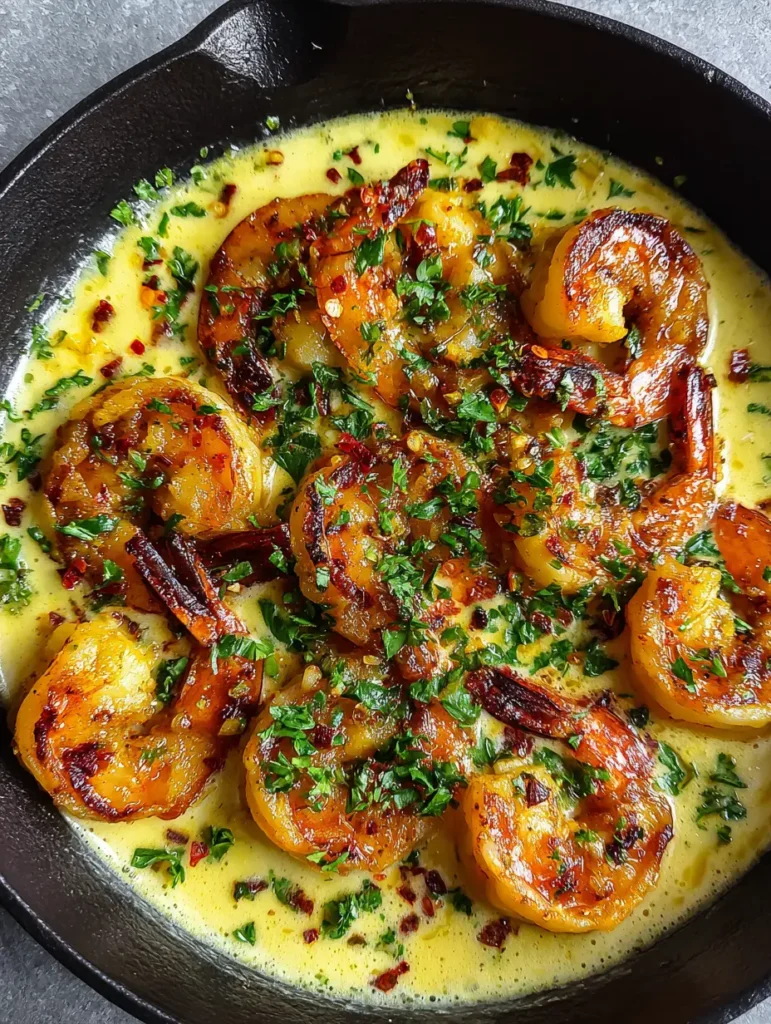
The visual appeal of this dish relies on the contrast between the bright green flat-leaf parsley, the fiery pop of red chili flakes, and the glossy, opaque finish of the coconut milk. Every element is intentional, ensuring that your first bite is as rewarding as the initial visual impact. Get ready to master the art of the perfect sear and the ultimate dairy-free cream sauce.
Why This One-Pan Skillet Shrimp Strategy Works
- High-Contrast Textures: By searing the shrimp first at high heat, we create a crisp, charred exterior that stands up beautifully against the thick, silk-like coconut milk reduction.
- Aromatic Depth: Sautéing minced garlic until it reaches a specific golden-brown stage releases essential oils that permeate the entire sauce, providing a savory backbone to the tropical coconut.
- Vibrant Visual Cues: The heavy garnish of fresh flat-leaf parsley and dried red chili flakes isn’t just for flavor—it provides the professional color contrast required for a high-end presentation.
- Efficiency and Flavor Retention: Using a single cast iron skillet means we deglaze all those “fond” (browned bits) from the shrimp directly into the sauce, ensuring no flavor is wasted.
Essential Components for the Perfect Creamy Coconut Garlic Shrimp
The success of this Creamy Coconut Garlic Shrimp depends on the quality and preparation of your components. We are looking for specific chemical reactions—like the Maillard reaction on the shrimp—to ensure the final result isn’t just “boiled” in sauce but truly seared and smothered.
Jumbo Shrimp (1 lb / 450g): You want 16/20 count shrimp for the best visual impact. Their size allows them to develop a beautiful char without overcooking into rubbery curls. Always pat them bone-dry before seasoning to ensure a crust forms immediately upon hitting the pan.
Full-Fat Canned Coconut Milk (13.5 oz / 400ml): Do not use the carton-style coconut milk used for cereal. We need the high fat content of canned milk to achieve that thick, opaque ivory sauce that coats the back of a spoon. This is what provides the luxurious mouthfeel.
Fresh Garlic (6 cloves): Minced by hand rather than a press. Hand-minced garlic provides those distinct, golden-brown bits visible in the final dish, whereas pressed garlic can turn into a bitter paste too quickly.
Neutral High-Smoke Point Oil (2 tbsp / 30ml): Avocado oil or light olive oil is essential. Since we are using a cast iron skillet for a hard sear, butter alone would burn. We need the stability of oil to get those vibrant pink and orange tones with visible char marks.
Fresh Flat-Leaf Parsley: Unlike curly parsley, the flat-leaf variety has a more robust, “green” flavor and a softer texture that melds perfectly into the warm sauce. It provides the essential bright green garnish that makes the dish pop.
Dried Red Chili Flakes: These offer a controlled heat and a necessary visual “spark.” They break up the ivory landscape of the sauce and signal the complexity of the flavor profile.
The Culinary Physics of the Black Cast Iron Skillet
To achieve the specific look and taste of this recipe, the vessel is as important as the ingredients. A black cast iron skillet is the gold standard for Creamy Coconut Garlic Shrimp because of its heat retention properties. Unlike stainless steel or non-stick pans, cast iron radiates a steady, intense heat that mimics a professional grill.
When the shrimp hit the seasoned surface of the cast iron, the moisture evaporates instantly, allowing the proteins to caramelize. This creates the “pink and orange with visible char marks” described in our visual blueprint. If you are a fan of high-heat cooking, you might also enjoy the techniques used in blackstone steak quesadillas for that perfect griddle finish.
Furthermore, the dark surface of the skillet provides a stunning backdrop for the ivory sauce. This contrast is a secret used by food photographers to make colors appear more saturated. If your skillet isn’t well-seasoned, a light coating of oil and a slow pre-heat will ensure the shrimp don’t stick when you go for that aggressive sear.
Advanced Preparation: Mastering the Mise en Place
Because shrimp cook in a matter of minutes, you cannot afford to be chopping garlic while the pan is hot. “Mise en place” (everything in its place) is critical here. Start by peeling and deveining your shrimp, leaving the tails on for a more elegant, “gourmet” look. Dry them thoroughly with paper towels.
Mince your garlic finely but keep the pieces uniform. If some pieces are tiny and others large, the small ones will burn before the large ones soften. Wash and dry your parsley completely before chopping; wet parsley will clump together and look “bruised” rather than “bright green” on your final skillet.
Measure out your coconut milk and chili flakes. Having these ready allows you to transition from the searing phase to the simmering phase seamlessly, preventing the garlic from over-browning. This precision is the same level of care required when making a delicate chocolate ganache recipe where temperature is everything.
Step-By-Step Culinary Execution for the Ultimate Result
Phase 1: The High-Heat Protein Sear
Place your cast iron skillet over medium-high heat. Allow it to heat for 3-4 minutes until a drop of water flicked onto the surface dances and evaporates instantly. Add your oil and swirl to coat. Carefully place the shrimp in the skillet, ensuring they do not overlap.
Sensory Cue: You should hear a loud, aggressive sizzle immediately. If it’s quiet, your pan isn’t hot enough. Leave them undisturbed for 2 minutes. You are looking for a vibrant pink hue and dark, charred edges. Flip and cook for only 1 minute on the other side, then remove them to a plate. They will finish cooking in the sauce later.
Phase 2: The Aromatic Foundation
Lower the heat to medium. If the pan looks dry, add a tiny splash of oil. Toss in the minced garlic. Stir constantly for about 45-60 seconds. You are looking for the garlic to turn a “golden-brown” color. The smell should be fragrant and nutty, not acrid or sharp.
Immediately pour in the full-fat coconut milk. Use a wooden spoon to scrape the bottom of the skillet. All those dark bits (the fond) left over from the shrimp will dissolve into the milk, turning it from bright white to a rich, opaque ivory. This is where the deep flavor of your Creamy Coconut Garlic Shrimp is born.
Phase 3: The Reduction and Emulsification
Bring the coconut milk to a gentle simmer. Do not let it reach a rolling boil, as this can cause the coconut fat to separate. Let it simmer for 3-5 minutes, stirring occasionally, until the sauce thickens enough to coat the back of a spoon. Season with salt and pepper to taste.
Once thickened, add the shrimp (and any juices from the plate) back into the skillet. Toss them gently to coat. The residual heat will finish the shrimp perfectly, keeping them tender rather than rubbery. This technique of emulsifying a fat-based sauce is similar to achieving the perfect consistency in creamy chicken alfredo.
Phase 4: The Final Presentation Garnish
Turn off the heat. This is the moment that defines the visual success of the dish. Sprinkle a heavy handful of finely chopped flat-leaf parsley across the entire surface. The residual heat will wake up the parsley’s oils without wilting it into mush.
Finally, scatter the dried red chili flakes over the top. The red against the green and ivory creates a professional, high-contrast look. Serve immediately, directly from the cast iron skillet, to maintain the heat and the “handheld smartphone photo” aesthetic of a rustic home-cooked meal.
Expert Troubleshooting for Kitchen Success
- Preventing Sauce Separation: If your sauce looks oily or “broken,” it likely boiled too hard. Stir in a teaspoon of cold water or an extra splash of coconut milk and whisk vigorously off the heat to bring it back together.
- Achieving the Char: If your shrimp are grey instead of pink/orange, you likely overcrowded the pan. Cook in batches if necessary. Moisture is the enemy of the sear!
- Balancing Flavor: Coconut milk is naturally sweet. If the dish feels too “heavy,” a small squeeze of fresh lime juice (though not in the visual prompt) can add a culinary brightness that balances the fat.
- Garlic Management: If your garlic turns dark brown or black, wipe out the pan and start over. Burnt garlic will ruin the entire sauce with a bitter aftertaste.
Optimal Side Dishes and Pairing Ideas
To turn this Creamy Coconut Garlic Shrimp into a full meal, you need a side dish that can soak up that incredible ivory sauce. A bed of jasmine rice is the traditional choice, but for a more robust flavor profile, consider serving it alongside one-pot black beans and rice. The earthiness of the beans provides a great counterpoint to the creamy coconut.
If you prefer a vegetable-forward meal, roasted broccoli or sautéed snap peas offer a crunch that contrasts with the tender shrimp. For those who love a “surf and turf” style spread, you could even serve these as an appetizer before a main course of chicken torta recipe (coming soon).
To finish the evening on a sweet note, the tropical vibes of the shrimp pair beautifully with citrusy desserts. We highly recommend these lemon raspberry cookies for a bright, tangy finish that cleanses the palate after the richness of the garlic and coconut.
Frequently Asked Questions
Absolutely. While tails-on provides a more professional visual presentation, removing them makes the dish much easier to eat, especially if serving over rice or pasta.
Yes, but they must be completely thawed and patted dry with paper towels. Any excess moisture will prevent the shrimp from getting those signature char marks in the cast iron skillet.
Sauté the garlic over medium heat only after the shrimp are removed. Stir constantly and have your coconut milk ready to pour in as soon as the garlic turns golden-brown to stop the cooking process.
Yes! By using full-fat coconut milk instead of heavy cream, this dish is naturally dairy-free and very low in carbohydrates, making it perfect for keto or paleo lifestyles.
This usually happens if you use ‘lite’ coconut milk or the kind from a carton. Always use full-fat canned coconut milk and allow it to simmer for at least 3-5 minutes to reduce and thicken.
The Complete Creamy Coconut Garlic Shrimp Recipe Card
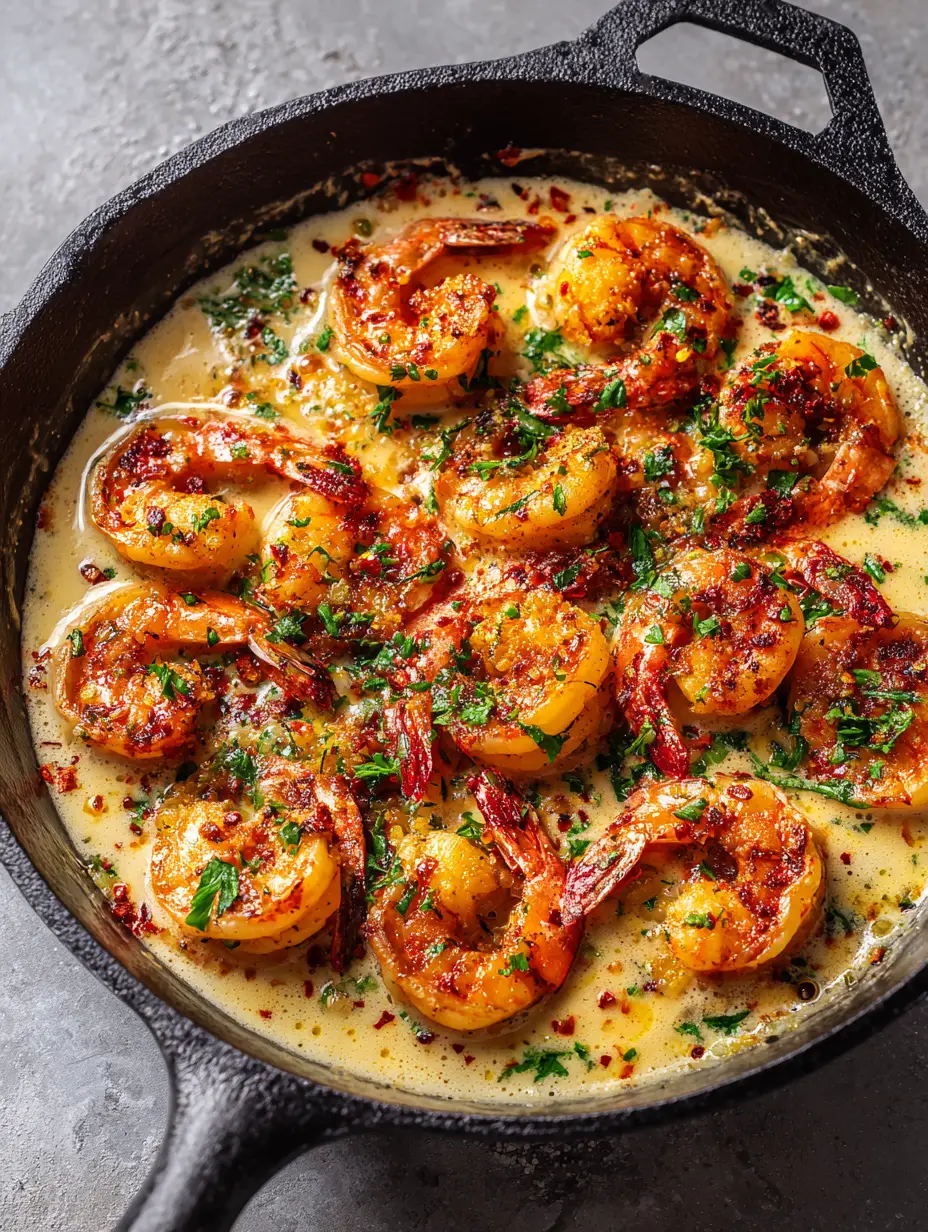
Creamy Coconut Garlic Shrimp with Seared Jumbo Skillet Prawns
Ingredients
Equipment
Method
- Pat the jumbo shrimp completely dry with paper towels and season lightly with salt and pepper.
- Heat oil in the cast iron skillet over medium-high heat. Add shrimp in a single layer and sear for 2 minutes until vibrant pink with visible char marks. Flip and cook 1 more minute. Remove to a plate.
- Reduce heat to medium. Add minced garlic to the skillet and sauté for 45-60 seconds until golden-brown and fragrant.
- Pour in the coconut milk, scraping the bottom of the pan to release the flavorful fond. Simmer for 3-5 minutes until the ivory sauce thickens enough to coat a spoon.
- Return shrimp to the skillet and toss to coat in the thick sauce for 1 minute.
- Turn off heat. Top with a heavy garnish of chopped flat-leaf parsley and dried red chili flakes. Serve immediately.
Notes
Do not overcrowd the skillet or the shrimp will steam instead of char.
Join the Kitchen Spark Community!
This Creamy Coconut Garlic Shrimp is more than just a recipe; it’s a masterclass in skillet technique and flavor balancing. We hope this dish brings a touch of “gourmet” to your weeknight routine. If you enjoyed this recipe, please leave a comment below and let us know how your sear turned out!
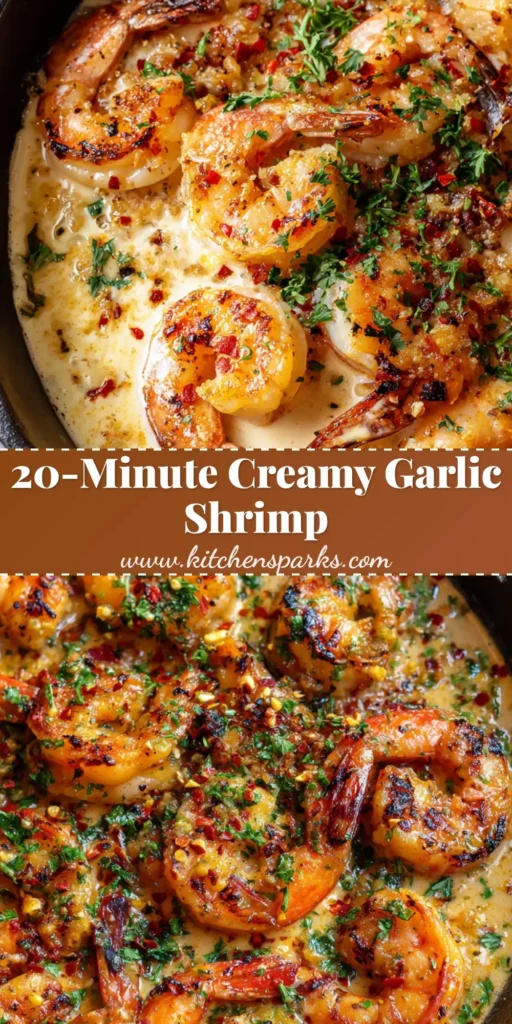
Don’t forget to take a photo of your beautiful cast iron creation and tag us. For more visual inspiration and recipe ideas, follow us on Pinterest and save this pin to your “Easy Dinner” boards. Happy cooking!