There is nothing quite like the sensory experience of pulling a fresh, shimmering Sourdough Focaccia out of the oven. Imagine a bread so light it feels like a cloud, yet so crisp on the bottom that it shatters with every bite. The surface is a landscape of deep craters, filled with pools of liquid gold olive oil and punctuated by the resinous aroma of fresh rosemary.
This isn’t just a side dish; it is a culinary event. Inspired by the rustic, unedited aesthetic of home-baked perfection, this recipe focuses on high-hydration techniques that result in those iconic, giant air bubbles and a perfectly charred, golden-brown crust. Whether you are a sourdough veteran or a curious beginner, this guide will walk you through the science of the crumb.
Achieving that “Instagram-worthy” dimpled look requires patience and the right ratio of fermentation to heat. By the time we are done, you will have a rectangular loaf of sourdough bread that looks like it was plucked straight from a boutique bakery in Liguria. Let’s dive into the flour, water, and wild yeast that make this magic happen.

Why This Is the Only Sourdough Focaccia Recipe You Will Ever Need
- Unmatched Texture: A high-hydration dough (80%+) ensures an airy, porous crumb and massive internal air pockets.
- Visual Perfection: We utilize a dark metal baking pan to achieve those signature charred golden-brown bubble edges seen in professional bakeries.
- Symphonic Crunch: The combination of heavy extra virgin olive oil and flaky sea salt creates a deep-fried-style bottom crust that is utterly addictive.
- Deep Flavor Profile: A long cold-fermentation process develops complex lactic and acetic acids that simple yeast breads just can’t match.
The Anatomy of Ingredients for an Airy Crumb
Active Sourdough Starter: 1/2 cup (100g). Your starter should be at its peak—bubbly, active, and capable of doubling in size within 4-6 hours to ensure a powerful rise.
Strong Bread Flour: 4 cups (500g). Look for a flour with at least 12-13% protein content to provide the structural integrity needed to trap those massive gas bubbles without collapsing.
Warm Filtered Water: 1 2/3 cups (400ml). High hydration is the secret to the “airy” look; using filtered water ensures that chlorine doesn’t inhibit your wild yeast’s performance.
Fine Sea Salt (for dough): 2 tsp (10g). This seasons the dough from within and regulates the fermentation rate for a consistent, even rise.
Extra Virgin Olive Oil: 1/2 cup (120ml). High-quality oil is both an ingredient and a cooking medium here; it creates the “fried” texture on the crust and pools beautifully in the dimples.
Fresh Rosemary Needles: 2-3 sprigs. Fresh needles are essential for that resinous, herbal punch that pairs perfectly with the fermented tang of the sourdough.
Maldon Flaky Sea Salt: 1 tbsp (15g). These large, flat crystals provide the essential visual “sparkle” and a satisfying crunch that doesn’t over-salt the palate.
Essential Tools for a Professional Bake
To achieve the visual result described—a rectangular loaf with a deep brown crust—you must use a 9×13 inch (23x33cm) metal baking pan. Dark metal is preferred because it absorbs and radiates heat more efficiently than glass or ceramic, which is the key to getting those charred edges on the bubbles.
You will also need a large glass mixing bowl for the bulk fermentation and a set of silicone spatulas. However, the most important tool you have is your hands. The “dimpling” process is a tactile skill that we will master in the step-by-step instructions below.
Mastering the Sourdough Focaccia Process
Phase 1: Mixing and the Autolyse
In a large bowl, whisk together your active starter and warm water until the starter is mostly dissolved and the water looks milky. Add your bread flour and mix by hand until a shaggy dough forms and no dry flour remains.
Cover the bowl with a damp cloth and let it rest for 30 minutes. This “autolyse” period allows the flour to fully hydrate and the gluten to begin forming naturally before we even start kneading.
Phase 2: Bulk Fermentation and Stretch-and-Folds
Sprinkle the fine sea salt over the dough and add a splash of water to help it dissolve. Pinch the salt into the dough, then perform your first set of “stretch and folds” by grabbing the edge of the dough, pulling it upward, and folding it over itself.
Perform 4 sets of stretch and folds every 30 minutes. You will notice the dough transforming from a slack, sticky mess into a smooth, elastic, and strong mass. After the final fold, cover and let the dough rise at room temperature until it has increased in volume by about 50% and feels full of air.
Phase 3: The Cold Proof Secret
Generously coat your 9×13 inch metal pan with 2 tablespoons of extra virgin olive oil. Gently transfer the dough to the pan, turning it once to coat both sides in oil. Do not try to stretch it to the corners yet; it needs to relax.
Cover the pan tightly and place it in the refrigerator for 12 to 24 hours. This cold proof is non-negotiable for flavor development and helps create the “handheld smartphone photo” aesthetic of large, irregular bubbles.

Phase 4: Dimpling and the Final Bake
Remove the dough from the fridge 2 hours before baking. It should now naturally fill the corners of the pan and look like a jiggly, bubbly marshmallow. Preheat your oven to 425°F (220°C).
Drizzle the remaining olive oil over the top. Using your fingertips, press straight down into the dough to create deep dimples. You should see large bubbles rising around your fingers—this is the “bubbly bliss” we are looking for. Press the fresh rosemary needles into the dough and sprinkle generously with the Maldon flaky sea salt.
Bake for 25-30 minutes. Look for a deep golden-brown crust and watch for the edges of the bubbles to turn a dark, charred mahogany. The sound of the crust should be hollow when tapped.
Expert Tips for the Perfect Bubble Structure
- Don’t Degas: When transferring the dough to the pan, be as gentle as possible. We want to preserve every single bubble the yeast worked so hard to create.
- The Temperature Matters: If your kitchen is cold, your bulk fermentation might take 6-8 hours. Look for visual cues (bubbles on the surface) rather than just watching the clock.
- Oil is Your Friend: If the dough feels like it’s sticking to your fingers during dimpling, dip your hands in olive oil first.
- Use a Dark Pan: As mentioned, dark metal provides the most consistent “char” on the bottom and sides, ensuring it isn’t soggy.
How to Store and Revive Your Focaccia
Sourdough focaccia is best enjoyed the day it is made, while the crust is at its peak crispness. However, you can store leftovers in an airtight container at room temperature for up to 2 days. To freeze, wrap individual slices in foil and place them in a freezer bag for up to 3 months.
To reheat, avoid the microwave! Place slices in a 350°F (175°C) oven or toaster oven for 5-8 minutes. This will re-crisp the olive oil-soaked crust and return the interior to its soft, airy state.
Creative Pairings and Serving Suggestions
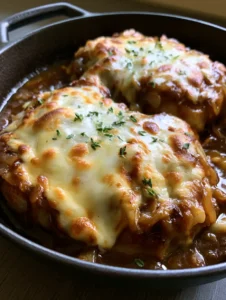
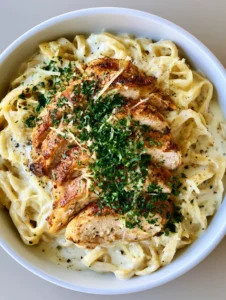
While this Sourdough Focaccia is a meal in itself, it shines when paired with bold flavors. Use thick slices to build a gourmet chicken torta (coming soon) or serve it alongside a bowl of creamy chicken alfredo to soak up every drop of sauce.
For a true appetizer feast, serve it with a side of garlicky cowboy butter for dipping. It also makes an incredible base for a “focaccia taco” if you’re feeling adventurous after trying smash burger tacos.
Frequently Asked Questions
Yes, but glass or ceramic pans don’t conduct heat as well. You may need to bake it longer to achieve the charred golden-brown crust, and the bottom may not be as crisp.
The secret is high hydration (80%+) and the cold proof. The cold temperature slows down fermentation, allowing large CO2 pockets to form without the dough collapsing.
Not at all. A 24-hour cold proof actually enhances the sourdough flavor and improves the texture. However, going beyond 48 hours may cause the dough to over-proof and lose structural integrity.
A high-protein bread flour (12.7% protein or higher) is best. It provides the gluten strength necessary to hold the high water content and the large gas bubbles.
Lack of bubbles is usually due to an under-active starter or insufficient bulk fermentation. Ensure your starter is at its peak and the dough has increased by 50% in volume before the cold proof.
The Ultimate Sourdough Focaccia Recipe

Sourdough Focaccia: The Ultimate Guide to an Airy, Bubbly, and Charred Masterpiece
Ingredients
Equipment
Method
- Whisk active starter and warm water in a large bowl. Add bread flour and mix until a shaggy dough forms. Rest for 30 minutes.
- Add fine salt. Perform 4 sets of stretch and folds every 30 minutes until dough is elastic and smooth.
- Let dough rise at room temperature until 50% larger. Transfer to a dark metal pan with 2 tbsp oil. Cover and refrigerate for 12-24 hours.
- Remove from fridge 2 hours before baking. Drizzle with remaining oil. Use fingertips to create deep dimples and large air bubbles. Press in rosemary and Maldon salt.
- Bake at 425°F (220°C) for 25-30 minutes until the crust is a deep golden brown with charred edges.
Notes
Use a dark metal pan to achieve professional-level charring on the bubbles.

Join the Bread Revolution
Mastering the art of sourdough is a journey, and this focaccia is the perfect milestone. The combination of the charred golden-brown crust and the airy porous crumb makes it a centerpiece that demands to be shared. We would love to see your bubbly creations! Tag us in your photos and follow our journey for more culinary inspiration on Pinterest.
Do you have a favorite topping? From blistered tomatoes to caramelized onions, the possibilities are endless. Leave a comment below and let us know how your bake turned out!
Happy Baking!