There is a specific kind of magic that happens when deep, bittersweet cocoa meets the tropical, creamy sweetness of shredded coconut. This Chocolate Coconut Cake isn’t just another dessert; it is a structural masterpiece designed for the true cocoa connoisseur. If you have been searching for that perfect, tall slice of cake that looks like it stepped out of a high-end bakery window, you have found it.
Inspired by the classic flavor profiles of premium confections, this recipe delivers a striking visual contrast. We are talking about two thick layers of dark, porous chocolate sponge sandwiching a dense, bright white coconut cream filling. Topped with a silky dark chocolate ganache and a fine snow of coconut flakes, every bite is a study in texture and balanced sweetness.
Imagine sitting at a light-colored wooden table, a soft glow of natural daylight hitting your plate. You pick up a fork and sink it into a smooth, cocoa-brown exterior, hitting that fluffy white center. That is the experience we are recreating today. Whether it is a birthday celebration or a weekend indulgence, this cake is designed to impress both the eyes and the palate.

Why This Is the Only Chocolate Coconut Cake Recipe You Need
- Unmatched Texture: The sponge is engineered to be incredibly moist and porous, ensuring it never feels dry or crumbly.
- Visual Contrast: The bright white coconut filling against the dark cocoa sponge creates a stunning “wow factor” when sliced.
- Professional Finish: We use a specific technique for the ganache to ensure it is smooth, glossy, and sets perfectly.
- Balanced Sweetness: By using dark chocolate in the frosting, we balance the sweetened shredded coconut to prevent the cake from being cloying.
Essential Ingredients for a Moist Chocolate Sponge
Dutch-Processed Cocoa Powder: 1.5 cups (130g). We use Dutch-processed cocoa to achieve that signature dark, porous, and almost black appearance seen in the visual prompt. It provides a smoother, deeper chocolate flavor than natural cocoa.
Boiling Water: 1 cup (240ml). Pouring boiling water over the cocoa powder “blooms” the chocolate, releasing trapped flavor oils and ensuring a moist, tender crumb.
Granulated Sugar: 2 cups (400g). Sugar does more than sweeten; it hygroscopically holds onto moisture, keeping your Chocolate Coconut Cake fresh for days.
Vegetable Oil: 0.5 cup (120ml). While butter adds flavor, oil is the secret to a cake that stays soft even when refrigerated. It creates the “porous” texture we are looking for.
Large Eggs: 2 units. Ensure they are at room temperature to create a stable emulsion with the fats and liquids.
All-Purpose Flour: 2 cups (250g). This provides the structural skeleton for our tall, upright layers without making the cake heavy.
Baking Soda and Powder: 1.5 tsp (7g) each. These chemical leaveners react with the cocoa and heat to create the airy, porous holes in the sponge.
The Secrets to the Dense White Coconut Filling
Heavy Whipping Cream: 1 cup (240ml). Cold heavy cream is the base for our bright white filling, providing a rich, aerated mouthfeel.
Sweetened Shredded Coconut: 2 cups (200g). This is the star of the show, providing the “dense” texture and unmistakable tropical flavor.
Powdered Sugar: 0.5 cup (60g). This sweetens the cream and helps stabilize the structure so the filling doesn’t squish out when the cake is sliced.
Vanilla Extract: 1 tsp (5ml). A hint of vanilla rounds out the coconut flavor, making it taste like a gourmet candy bar.
If you love the combination of cream and tropical flavors, you might also enjoy our creamy coconut garlic shrimp for a savory twist on these ingredients.
Tools Required for Bakery-Quality Results
To achieve the look of a tall slice standing upright on a white ceramic plate, you need two 8-inch (20cm) round cake pans. High-sided pans help the cake climb, resulting in those thick layers described in the blueprint. An offset spatula is also non-negotiable for achieving that smooth, dark cocoa-brown frosting finish.
A stand mixer or electric hand mixer is essential for whipping the coconut filling to the correct density. You will also want a wire cooling rack to ensure the sponge cools completely before frosting—otherwise, your beautiful chocolate ganache recipe will melt right off the sides.

Mastering the Dark Chocolate Sponge Layers
Preparing the Cocoa Bloom
In a medium heat-proof bowl, whisk your Dutch-processed cocoa with the boiling water. Watch as the mixture turns into a dark, glossy liquid. This step is critical for the “dark cocoa-brown” visual. Let it sit for 5 minutes to cool slightly before adding it to the batter.
Mixing the Dry and Wet Ingredients
In your large mixing bowl, sift together the flour, sugar, baking powder, baking soda, and a pinch of salt. In a separate bowl, whisk the eggs, oil, and vanilla. Slowly incorporate the wet ingredients into the dry, followed by the cocoa mixture. The batter will be thin, but don’t worry—this is the secret to the porous texture.
Baking for Height and Structure
Divide the batter evenly between your two greased 8-inch pans. Bake at 350°F (175°C) for 30-35 minutes. You are looking for a visual cue: the edges should just begin to pull away from the pan, and a toothpick should come out with a few moist crumbs. Do not overbake, or you will lose the “moist” sponge quality.
Creating the Dense Coconut Filling and Ganache Frosting
Whipping the Bright White Filling
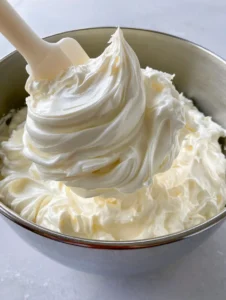
In a chilled bowl, whip the heavy cream and powdered sugar until stiff peaks form. Gently fold in the sweetened shredded coconut. It should be thick, dense, and stark white. This creates the beautiful “sandwiched” effect between the dark layers.
Achieving the Smooth Ganache Exterior
Heat 1 cup (240ml) of heavy cream until just simmering, then pour over 8oz (225g) of chopped dark chocolate. Let it sit for 5 minutes, then stir gently from the center outward until a smooth, dark cocoa-brown frosting forms. Let it thicken at room temperature until it reaches a spreadable consistency.
Assembling Your Chocolate Coconut Cake Masterpiece
Place one cooled sponge layer on your serving plate. Spread the entire coconut filling mixture over the top, pushing it almost to the edges. Top with the second sponge layer. Cover the top and sides with the chocolate ganache using your offset spatula for a smooth finish.
Finally, take a handful of white shredded coconut flakes and concentrate them on the top surface. This “fine sprinkle” provides the final visual contrast that makes the Chocolate Coconut Cake look so professional. If you’re a fan of rich, decadent chocolate bakes, you should also check out our chocolate peanut butter dump cake for a quicker weeknight treat.
Expert Tips for Success
- Room Temperature Ingredients: Always ensure your eggs and dairy are at room temp (except for the whipping cream) to prevent the batter from curdling.
- The Crumb Coat: Apply a very thin layer of ganache first and chill for 15 minutes. This “traps” the crumbs so your final exterior is perfectly smooth.
- Check Your Coconut: Use “sweetened” shredded coconut for the filling; unsweetened desiccated coconut will be too dry and won’t achieve that “dense” look.
- Slicing Technique: For a clean “tall slice,” dip your knife in hot water and wipe it dry between every single cut.
Storage, Reheating, and Freezing Advice
This Chocolate Coconut Cake keeps exceptionally well thanks to the oil-based sponge. Store it in an airtight container in the refrigerator for up to 5 days. Because of the heavy cream filling, it should not be left at room temperature for more than 2 hours.
To freeze, wrap individual slices in plastic wrap and then foil. They will stay fresh for up to 3 months. Thaw overnight in the fridge before serving. If you enjoy making cakes ahead of time, you might also like our fresh peach cake recipe which is another fantastic seasonal showstopper.
What to Serve with Your Chocolate Coconut Cake
This cake is a rich, standalone star, but it pairs beautifully with a cup of strong black coffee or a glass of cold milk. If you are hosting a full dinner party, consider serving a light, savory main course to balance the decadence of the dessert. Our one-pot black beans and rice provides a great earthy contrast to the tropical coconut notes.
For a complete dessert spread, consider adding some smaller treats like lemon raspberry cookies to provide a bright, acidic counterpoint to the deep chocolate.
Frequently Asked Questions
Yes, you can use hot coconut milk to bloom the cocoa. It will add a subtle coconut undertone to the sponge, though boiling water is better for achieving that specific porous, light texture.
You can, but the filling will be significantly less sweet and have a drier texture. If using unsweetened, you may need to increase the powdered sugar by 2-3 tablespoons.
Yes, because the filling is made with heavy whipping cream, the cake should be stored in the refrigerator to stay food-safe and maintain its structure.
Use a kitchen scale to weigh your batter when pouring it into the pans. Also, ensure your cake layers are completely flat by trimming any domed tops with a serrated knife before assembling.
If your ganache is runny, it likely hasn’t cooled enough or the ratio of cream to chocolate was too high. Let it sit at room temperature for 30-60 minutes to thicken into a spreadable frosting.
The Ultimate Chocolate Coconut Cake Recipe

Chocolate Coconut Cake: The Ultimate Dark Chocolate and Sweetened Coconut Layer Cake
Ingredients
Equipment
Method
- Whisk boiling water into cocoa powder until smooth. Let cool.
- Combine dry ingredients in one bowl, wet in another. Slowly mix cocoa mixture into wet ingredients, then combine with dry. Do not overmix.
- Divide batter into two 8-inch pans. Bake at 350°F (175°C) for 30-35 mins until a toothpick comes out clean.
- Whip heavy cream and powdered sugar to stiff peaks. Fold in shredded coconut.
- Pour hot cream over chopped chocolate. Stir until smooth. Let thicken to spreading consistency.
- Layer cake, filling, cake. Frost exterior with ganache. Garnish with coconut flakes.
Notes
Ensure the cake is completely cool before filling to prevent melting.

Share Your Culinary Creations!
We can’t wait to see your version of this Chocolate Coconut Cake! This recipe is a labor of love that results in a truly bakery-quality dessert. If you made it, please leave a comment below and tell us how yours turned out. Don’t forget to follow us on Pinterest for more daily recipe inspiration and share your photos with the community!
Looking for more dessert ideas? Sign up for our newsletter to get the latest recipes delivered straight to your inbox, from decadent cakes to our famous homemade toaster strudel. Happy baking!