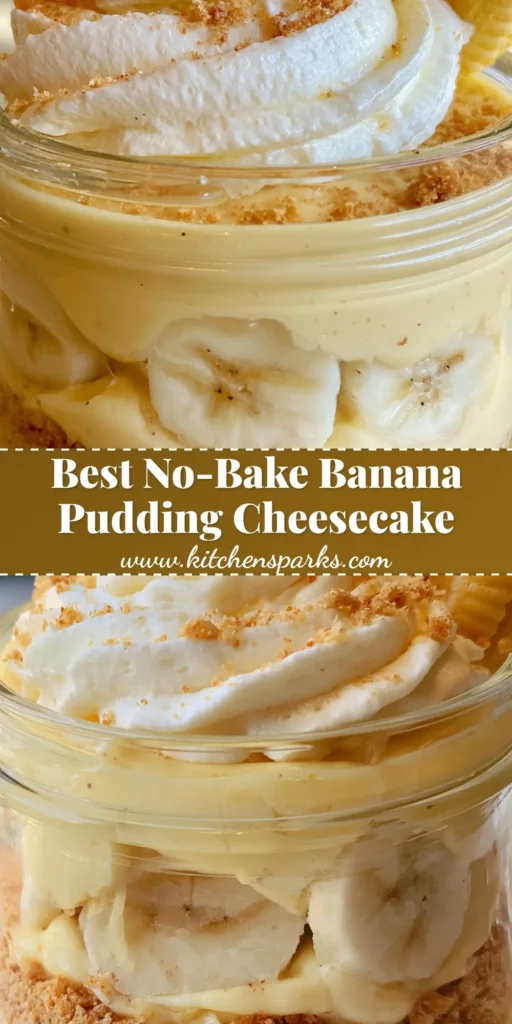
There is something undeniably nostalgic about the combination of creamy custard, crisp cookies, and fresh fruit. This No-Bake Banana Pudding Cheesecake takes those classic Southern flavors and elevates them into a sophisticated, individual dessert that looks as good as it tastes. By merging the tang of a cheesecake with the comforting soul of a traditional banana pudding, we’ve created a treat that is both light and indulgent.
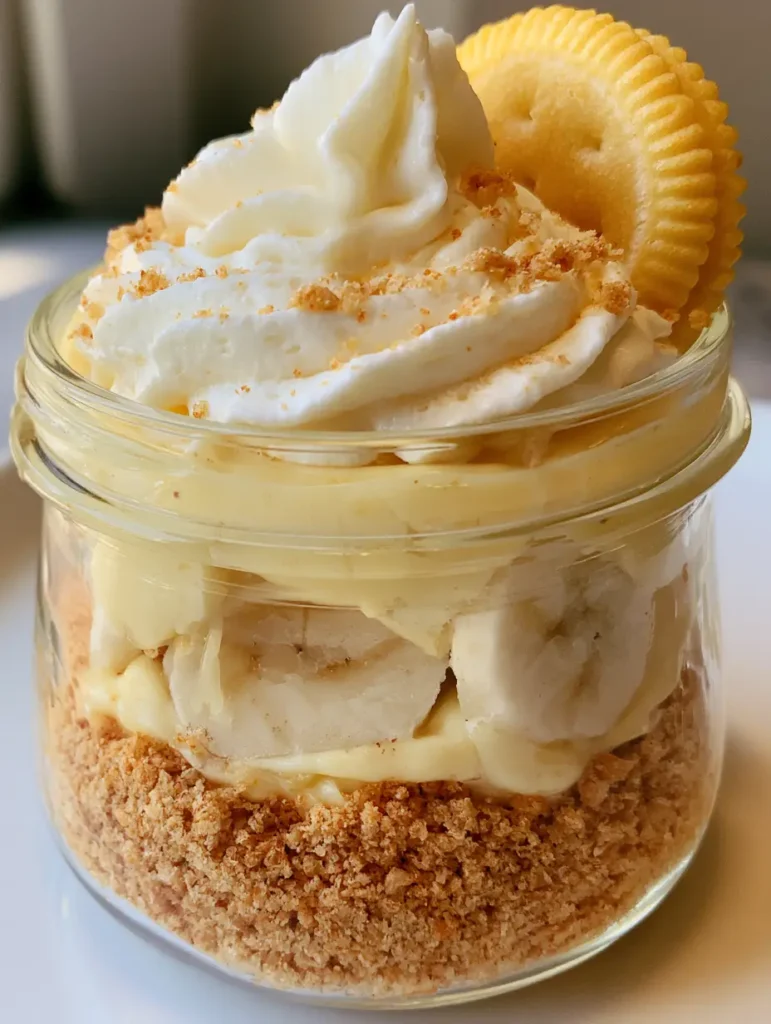
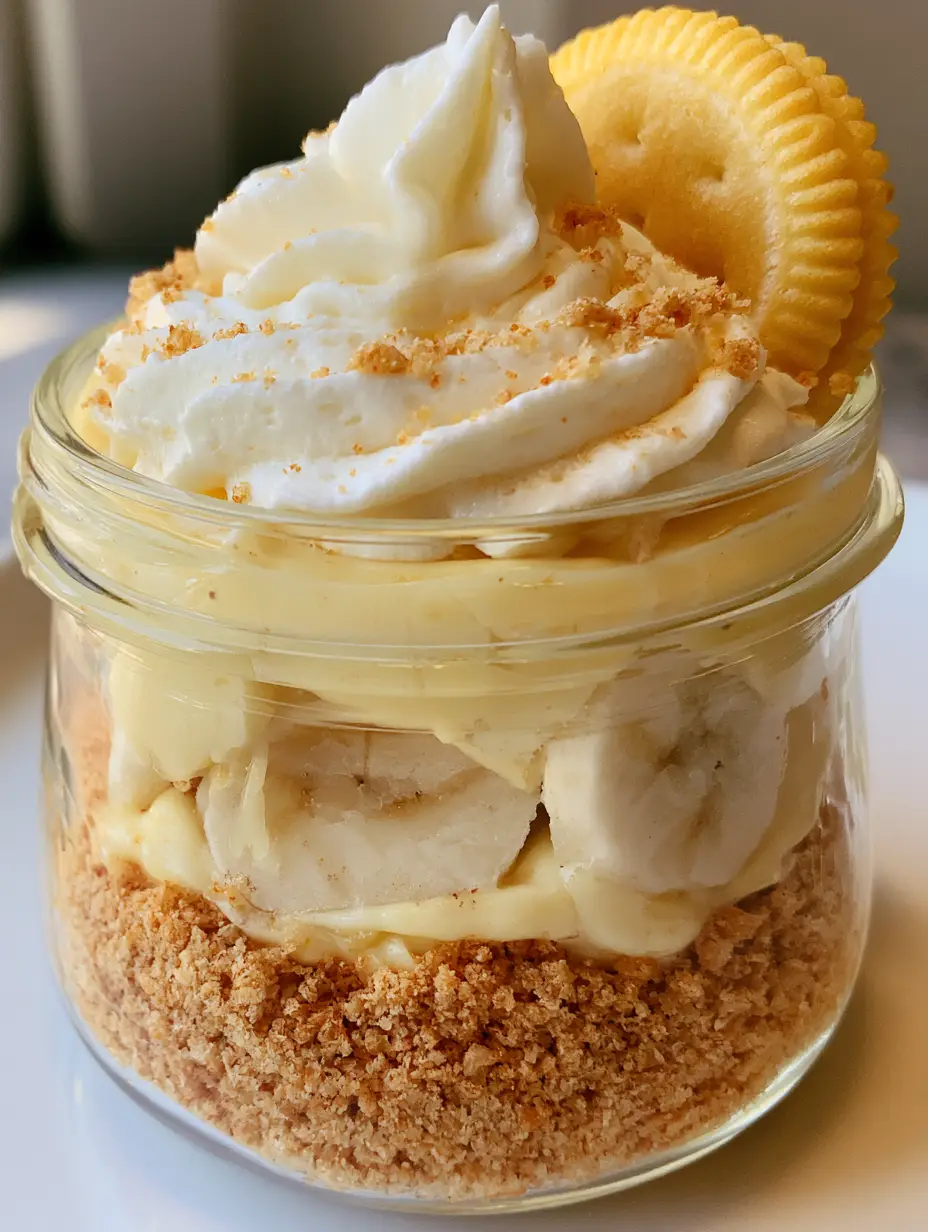
The beauty of this No-Bake Banana Pudding Cheesecake lies in its presentation. Served in clear glass jars, you can see every distinct layer: the golden-brown crumb base, the pale yellow cheesecake custard, and the bright white banana slices pressed against the glass. It’s the perfect “wow-factor” dessert for summer potlucks, bridal showers, or a cozy Sunday dinner where you want a high-impact finish without ever turning on the oven.
Inspired by the iconic flavors of a Southern banana cobbler, this recipe focuses on textural contrast. You get the crunch of the vanilla wafer, the silkiness of the filling, and the soft, velvet-like consistency of the whipped cream. Let’s dive into how to achieve that professional, photo-ready finish right in your own kitchen.
Why This No-Bake Banana Pudding Cheesecake Is a Total Showstopper
- No-Bake Ease: Skip the water baths and the cracked tops associated with traditional baking; this recipe sets up perfectly in the fridge every time.
- Visually Stunning Layers: The clear jar presentation showcases the “Forensic Visuals”—from the thick golden crust to the stiff whipped cream peaks.
- Controlled Portions: Serving these in jars makes them naturally portable and perfectly portioned for guests.
- Authentic Banana Flavor: Unlike some recipes that rely solely on artificial extracts, we use real banana puree for a deep, natural sweetness.
The Anatomy of the Perfect Golden-Brown Vanilla Wafer Crust
The foundation of any great No-Bake Banana Pudding Cheesecake is the crust. To achieve that thick, golden-brown layer of crushed vanilla wafer crumbs described in our visual blueprint, you need the right ratio of crumbs to fat. We use 1.5 cups (150g) of finely crushed vanilla wafers mixed with 4 tbsp (56g) of melted unsalted butter.
When crushing your cookies, aim for a “sandy” texture with a few larger pea-sized bits for extra crunch. The butter acts as the glue, ensuring that when you press the crumbs into the bottom of your glass jars, they stay put rather than floating into the cheesecake layer. For a more complex flavor profile, similar to what you might find in a cinnamon roll banana bread, consider adding a tiny pinch of sea salt to the crust mixture.
Crafting the Silky Pale Yellow Banana Cheesecake Filling
The filling must be smooth, stable, and a specific “pale yellow” to match the classic aesthetic. To achieve this, we combine 16 oz (450g) of softened cream cheese with 1 cup (240ml) of heavy cream and a secret ingredient: instant vanilla pudding mix. The pudding mix provides that iconic yellow hue and helps stabilize the cheesecake without the need for gelatin.
The key to the “smooth” texture mentioned in the visual prompt is the temperature of your ingredients. Your cream cheese must be truly room temperature to avoid lumps. When you fold in the fresh banana puree, do so gently. This ensures the filling remains airy and light, providing a stark contrast to the dense, crunchy crust below.
How to Keep Your Fresh Banana Slices Pristine and White
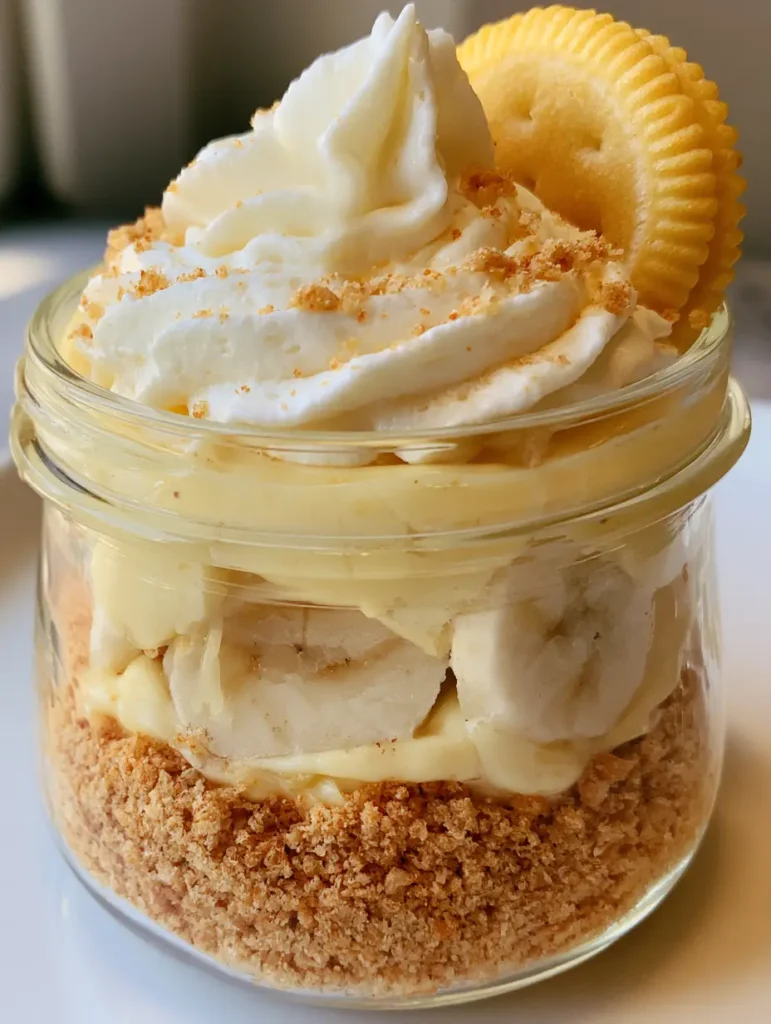
One of the most critical visual elements of this No-Bake Banana Pudding Cheesecake is the “visible thin, circular slices of fresh white banana.” Bananas are notorious for oxidizing and turning brown quickly once sliced. To prevent this, toss your slices in a tablespoon of lemon or pineapple juice before layering them into the jars.
When assembling, press the banana slices directly against the inside of the glass before adding the cheesecake filling. This traps them in an airtight environment, further preventing browning and creating that beautiful “window” effect. If you love fruit-forward cheesecakes, you might also enjoy the vibrant colors of a strawberry cheesecake dump cake.
Essential Equipment for a Professional Presentation
- 8oz (240ml) Glass Jars: Clear glass is essential to see the layered foundation and filling.
- Piping Bag with Large Star Tip: To achieve the “stiff, piped swirl” of whipped cream.
- Food Processor: For achieving the “fine cookie crumb dusting” mentioned in the blueprint.
- Offset Spatula: To smooth the cheesecake filling between the banana layers.
Step-by-Step Instructions: Assembling the Masterpiece
Step 1: Preparing the Wafer Foundation
In a medium bowl, combine your crushed vanilla wafers and melted butter. Stir until the mixture resembles wet sand. Divide the mixture evenly among 6 jars, pressing down firmly with the back of a spoon to create a flat, golden-brown base. Chill the jars in the freezer for 10 minutes to set the crust.
Step 2: Mixing the Banana Cheesecake Custard
In a large bowl, beat the cream cheese until smooth and fluffy. Add the sugar, vanilla, and instant pudding mix, beating until well combined. In a separate bowl, whip the heavy cream to stiff peaks, then gently fold it into the cream cheese mixture along with your banana puree. You are looking for a uniform, pale yellow color and a thick, mousse-like consistency.
Step 3: Layering with Visual Precision
Remove the jars from the freezer. Place a few banana slices against the glass walls. Carefully pipe or spoon the cheesecake filling into the jars, ensuring you fill the gaps around the bananas. Smooth the top with a small spoon. If you enjoy layered tropical flavors, our pineapple upside-down cheesecake cake is another fantastic variation to try.
Step 4: The Crowning Whipped Cream Swirl
Whip the remaining heavy cream with powdered sugar until it forms very stiff peaks. Using a piping bag fitted with a star tip, create a tall, decorative swirl on top of each jar. This “stiff, piped swirl” provides the vertical height necessary for a professional look.
Step 5: The Final Forensic Details
To finish the No-Bake Banana Pudding Cheesecake, tuck one whole vanilla wafer cookie into the side of the whipped cream at a 45-degree angle. Finally, sprinkle a “light dusting of fine cookie crumbs” over the top. This adds the final touch of texture and signals the flavors inside to the eater.
Pro Tips for No-Bake Success
- Use Ripe, Not Mushy, Bananas: For the puree, use bananas with some brown spots. For the slices, use firm yellow bananas so they hold their circular shape.
- Stabilize Your Cream: If you are serving these outdoors, add a teaspoon of “Whip It” or cornstarch to your whipped cream to ensure the peaks stay stiff.
- Chill Time is Non-Negotiable: These jars need at least 4 hours in the fridge to allow the flavors to meld and the filling to set to a sliceable (or scoopable) consistency.
- Crumb Control: For the “fine cookie crumb dusting,” pulse the wafers in a blender until they are a powder. For the crust, keep them slightly coarser.
Make-Ahead, Storage, and Serving Suggestions
This No-Bake Banana Pudding Cheesecake is an excellent make-ahead dessert. You can prepare the jars up to 24 hours in advance. However, for the absolute best visual results, wait to add the whole wafer cookie and the final crumb dusting until just before serving to keep the cookie from softening.
Store the jars in the refrigerator, covered with plastic wrap or their lids. We do not recommend freezing this recipe, as the fresh banana slices will lose their texture and the cheesecake filling may weep upon thawing. If you are looking for more make-ahead party food, consider our Greek honey pistachio cheesecake bars for your next gathering.
What to Serve with Banana Cheesecake Jars
Since this is a rich, creamy dessert, it pairs beautifully with light, savory dishes. It’s the perfect ending to a meal featuring a one-pan chicken and rice bake or a refreshing marinated cauliflower salad (coming soon). The sweetness of the banana balances out the acidity of Mediterranean-style marinades, making it a versatile finishing touch for any dinner party.
Frequently Asked Questions
Absolutely. Simply swap the standard vanilla wafers for your favorite gluten-free vanilla wafer brand. Ensure your pudding mix is also certified gluten-free.
Yes, you can! However, you may need to increase the crust ingredients by 50% to cover the larger surface area, and ensure you chill it for at least 6-8 hours so it’s firm enough to slice.
The instant pudding mix acts as a stabilizer and provides the classic pale yellow color. If you omit it, you will need to add more powdered sugar or a bit of gelatin to ensure the cheesecake sets up properly.
Toss your fresh banana slices in a little bit of lemon juice, lime juice, or pineapple juice before layering them. This acidity slows down the oxidation process, keeping them white and fresh for up to 24 hours.
For the filling puree, use overripe bananas with brown spots for maximum sweetness. For the visible slices, use firm, bright yellow bananas that will hold their shape without becoming mushy.
The Perfect No-Bake Banana Pudding Cheesecake Recipe
No-Bake Banana Pudding Cheesecake: The Ultimate Layered Dessert Jar
Ingredients
Equipment
Method
- Combine 1.5 cups (150g) of wafer crumbs with 4 tbsp (56g) melted butter. Press firmly into the bottom of 6 jars.
- Beat softened cream cheese and powdered sugar until smooth. Mix in the dry pudding mix and banana puree until pale yellow.
- In a separate bowl, whip 1 cup (240ml) heavy cream to stiff peaks. Gently fold it into the banana mixture.
- Place banana slices against the glass walls. Fill with cheesecake custard and smooth the tops.
- Pipe a stiff swirl of whipped cream on each. Add a whole cookie and a dusting of crumbs.
Notes
Ensure cream cheese is room temperature to avoid lumps in the smooth filling.
Conclusion: A Taste of Nostalgia in Every Spoonful
Creating a No-Bake Banana Pudding Cheesecake is about more than just mixing ingredients; it’s about crafting a multi-sensory experience. From the sound of the crunching wafer crust to the visual beauty of the layered jars, this recipe is designed to impress. It’s a testament to how simple ingredients, when treated with care and professional technique, can become something truly extraordinary.
We would love to see your creations! If you make these jars, please leave a comment below and let us know how they turned out. Don’t forget to share your photos and pin this recipe to your favorite dessert boards on Pinterest so you can find it whenever the craving for a creamy, banana-filled treat hits!